Documents
- Home ›
- Using NimGPT ›
- Documents
Documents
Nim features a super-powered document editor that allows you to create, edit, and remix documents with ease. You can also create documents from shortcuts or shortcuts chains.
You can work directly in the Nim document editor and collaborate with Nim. Writing content has never been easier!
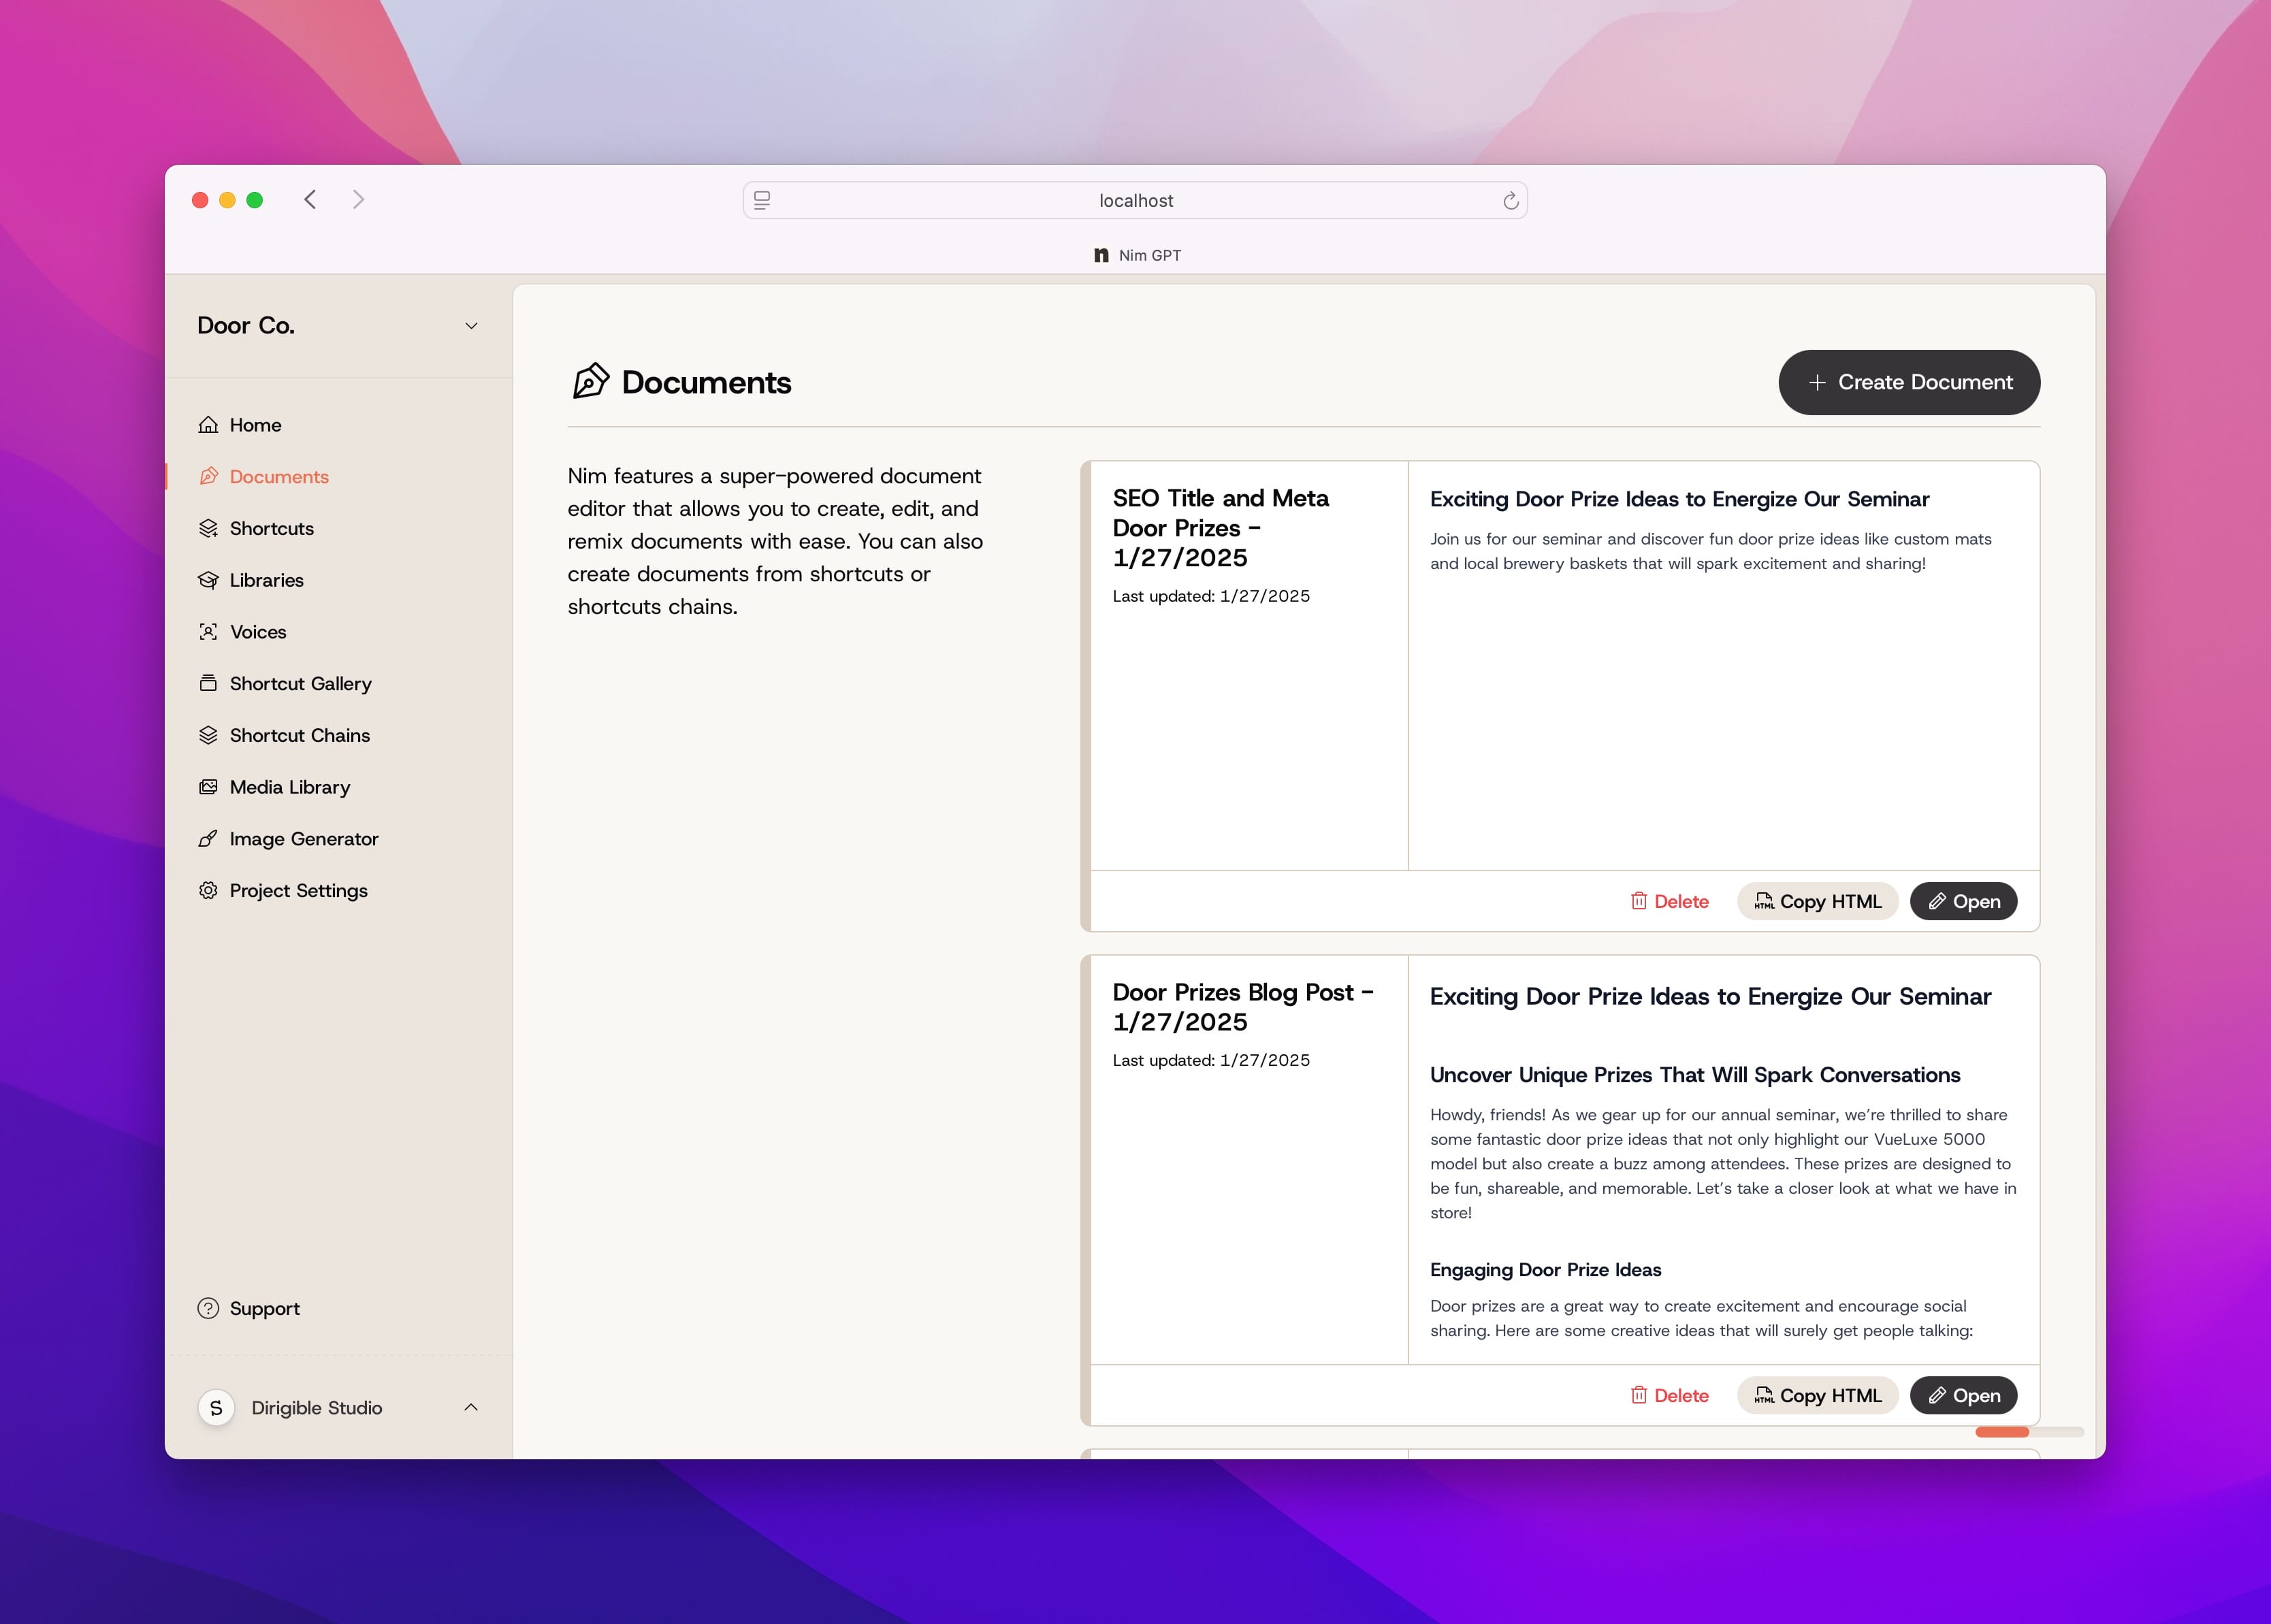
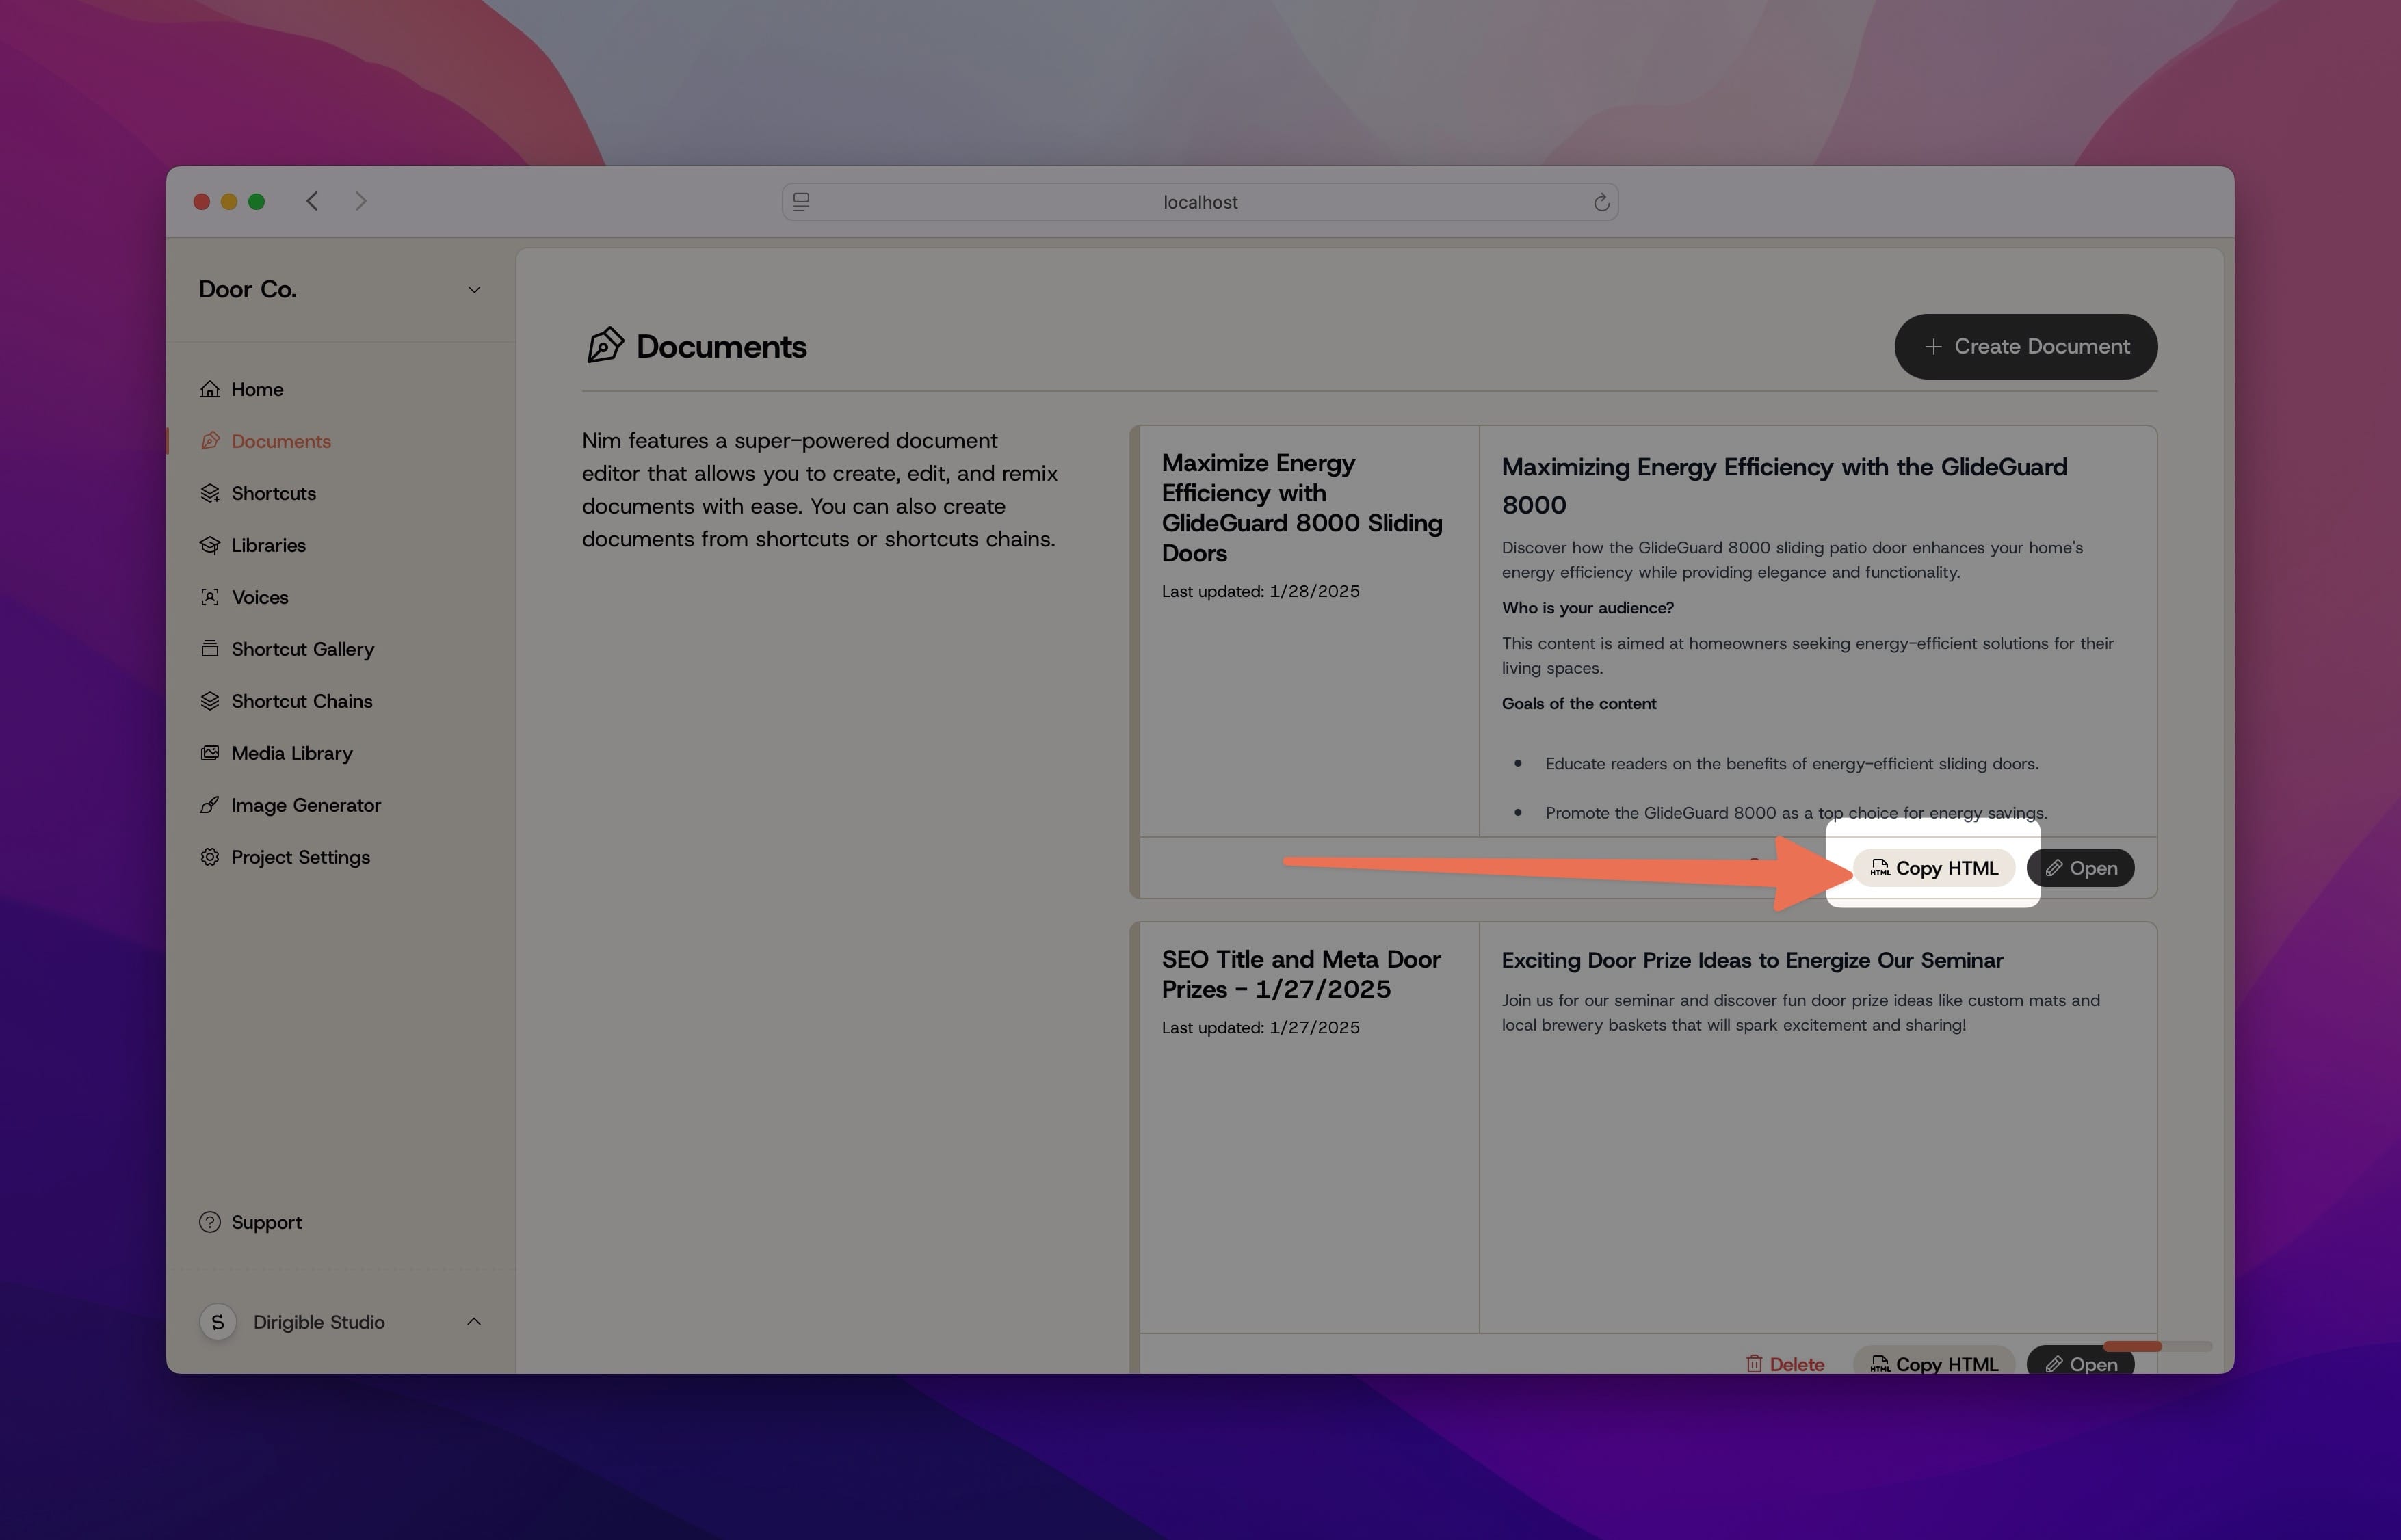
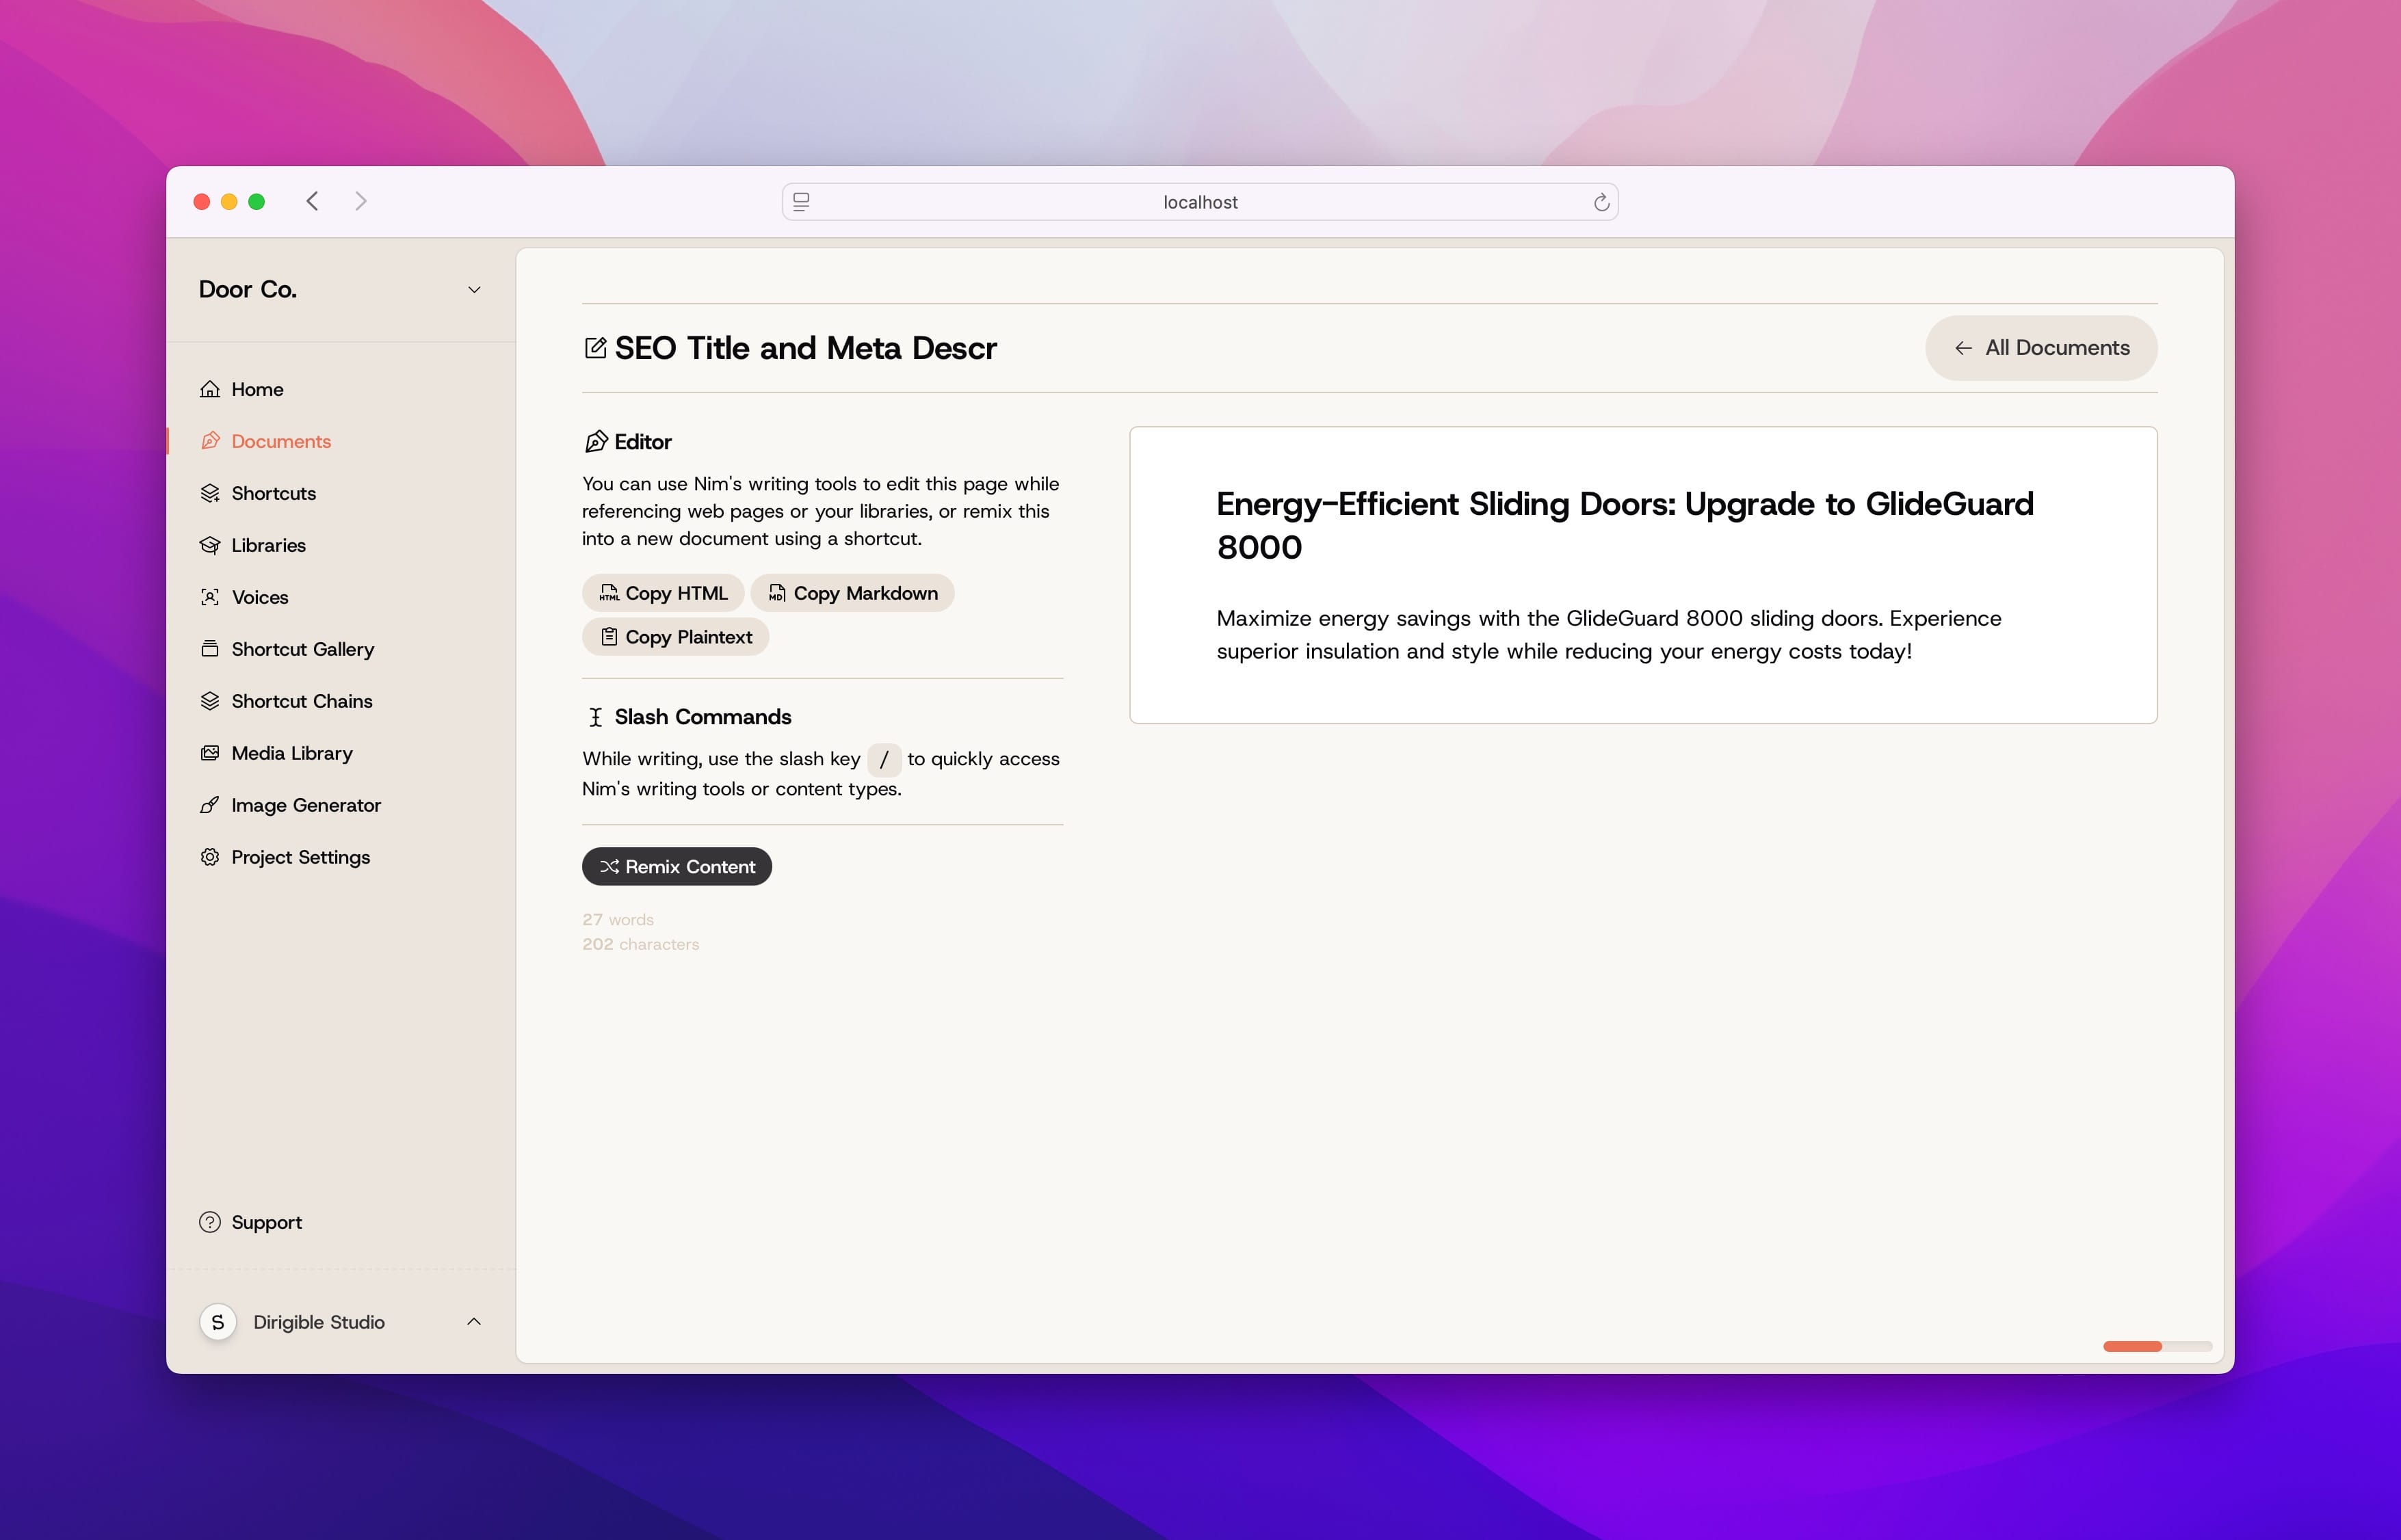
When you navigate to the Documents page of your NimGPT dashboard, you’ll see a list of all the Documents you’ve created in this project. You can see a short preview of each document or quickly copy the HTML of any of your Documents to your clipboard from here.
Creating Documents
You can create a new document directly from the Documents page, or from the output of a Shortcut, Shortcut Chain, or Remix.
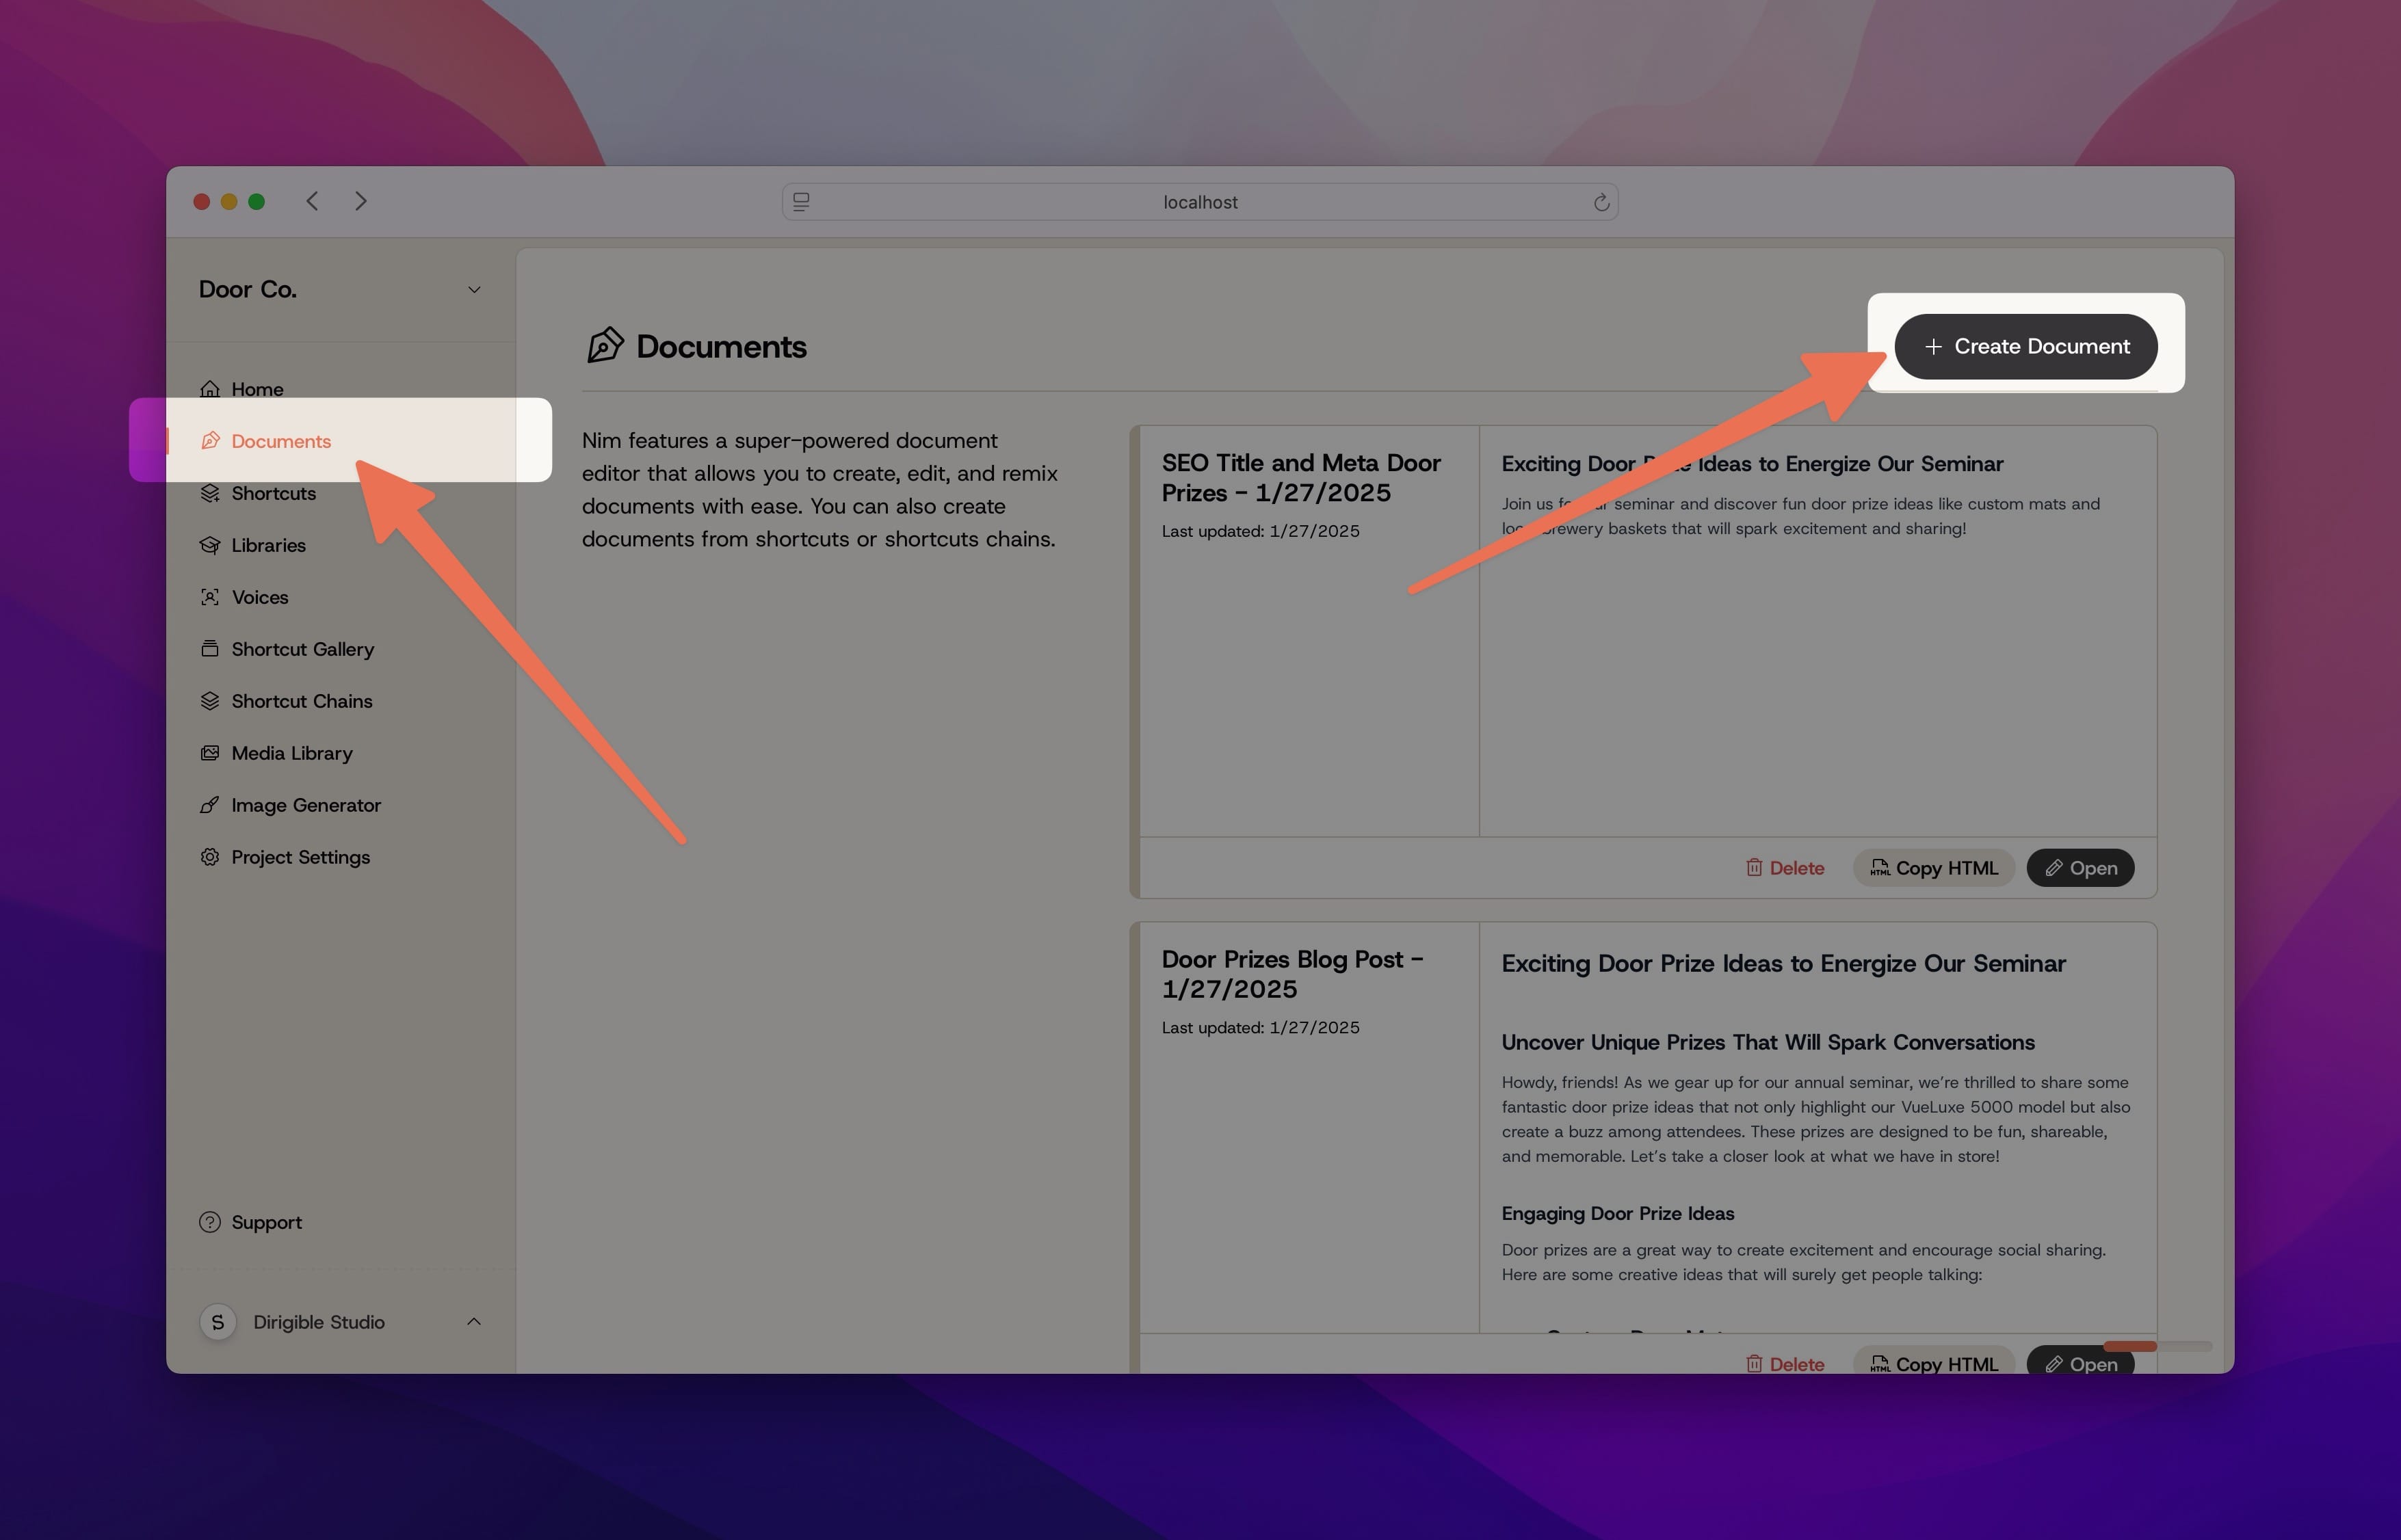
Creating a blank new Document
From the Documents page, you can create a new Document by clicking the Create Document button in the corner. This will create a new, blank Document
Note: When in doubt, look in the upper right corner of the NimGPT dashboard. Most actions are up there.
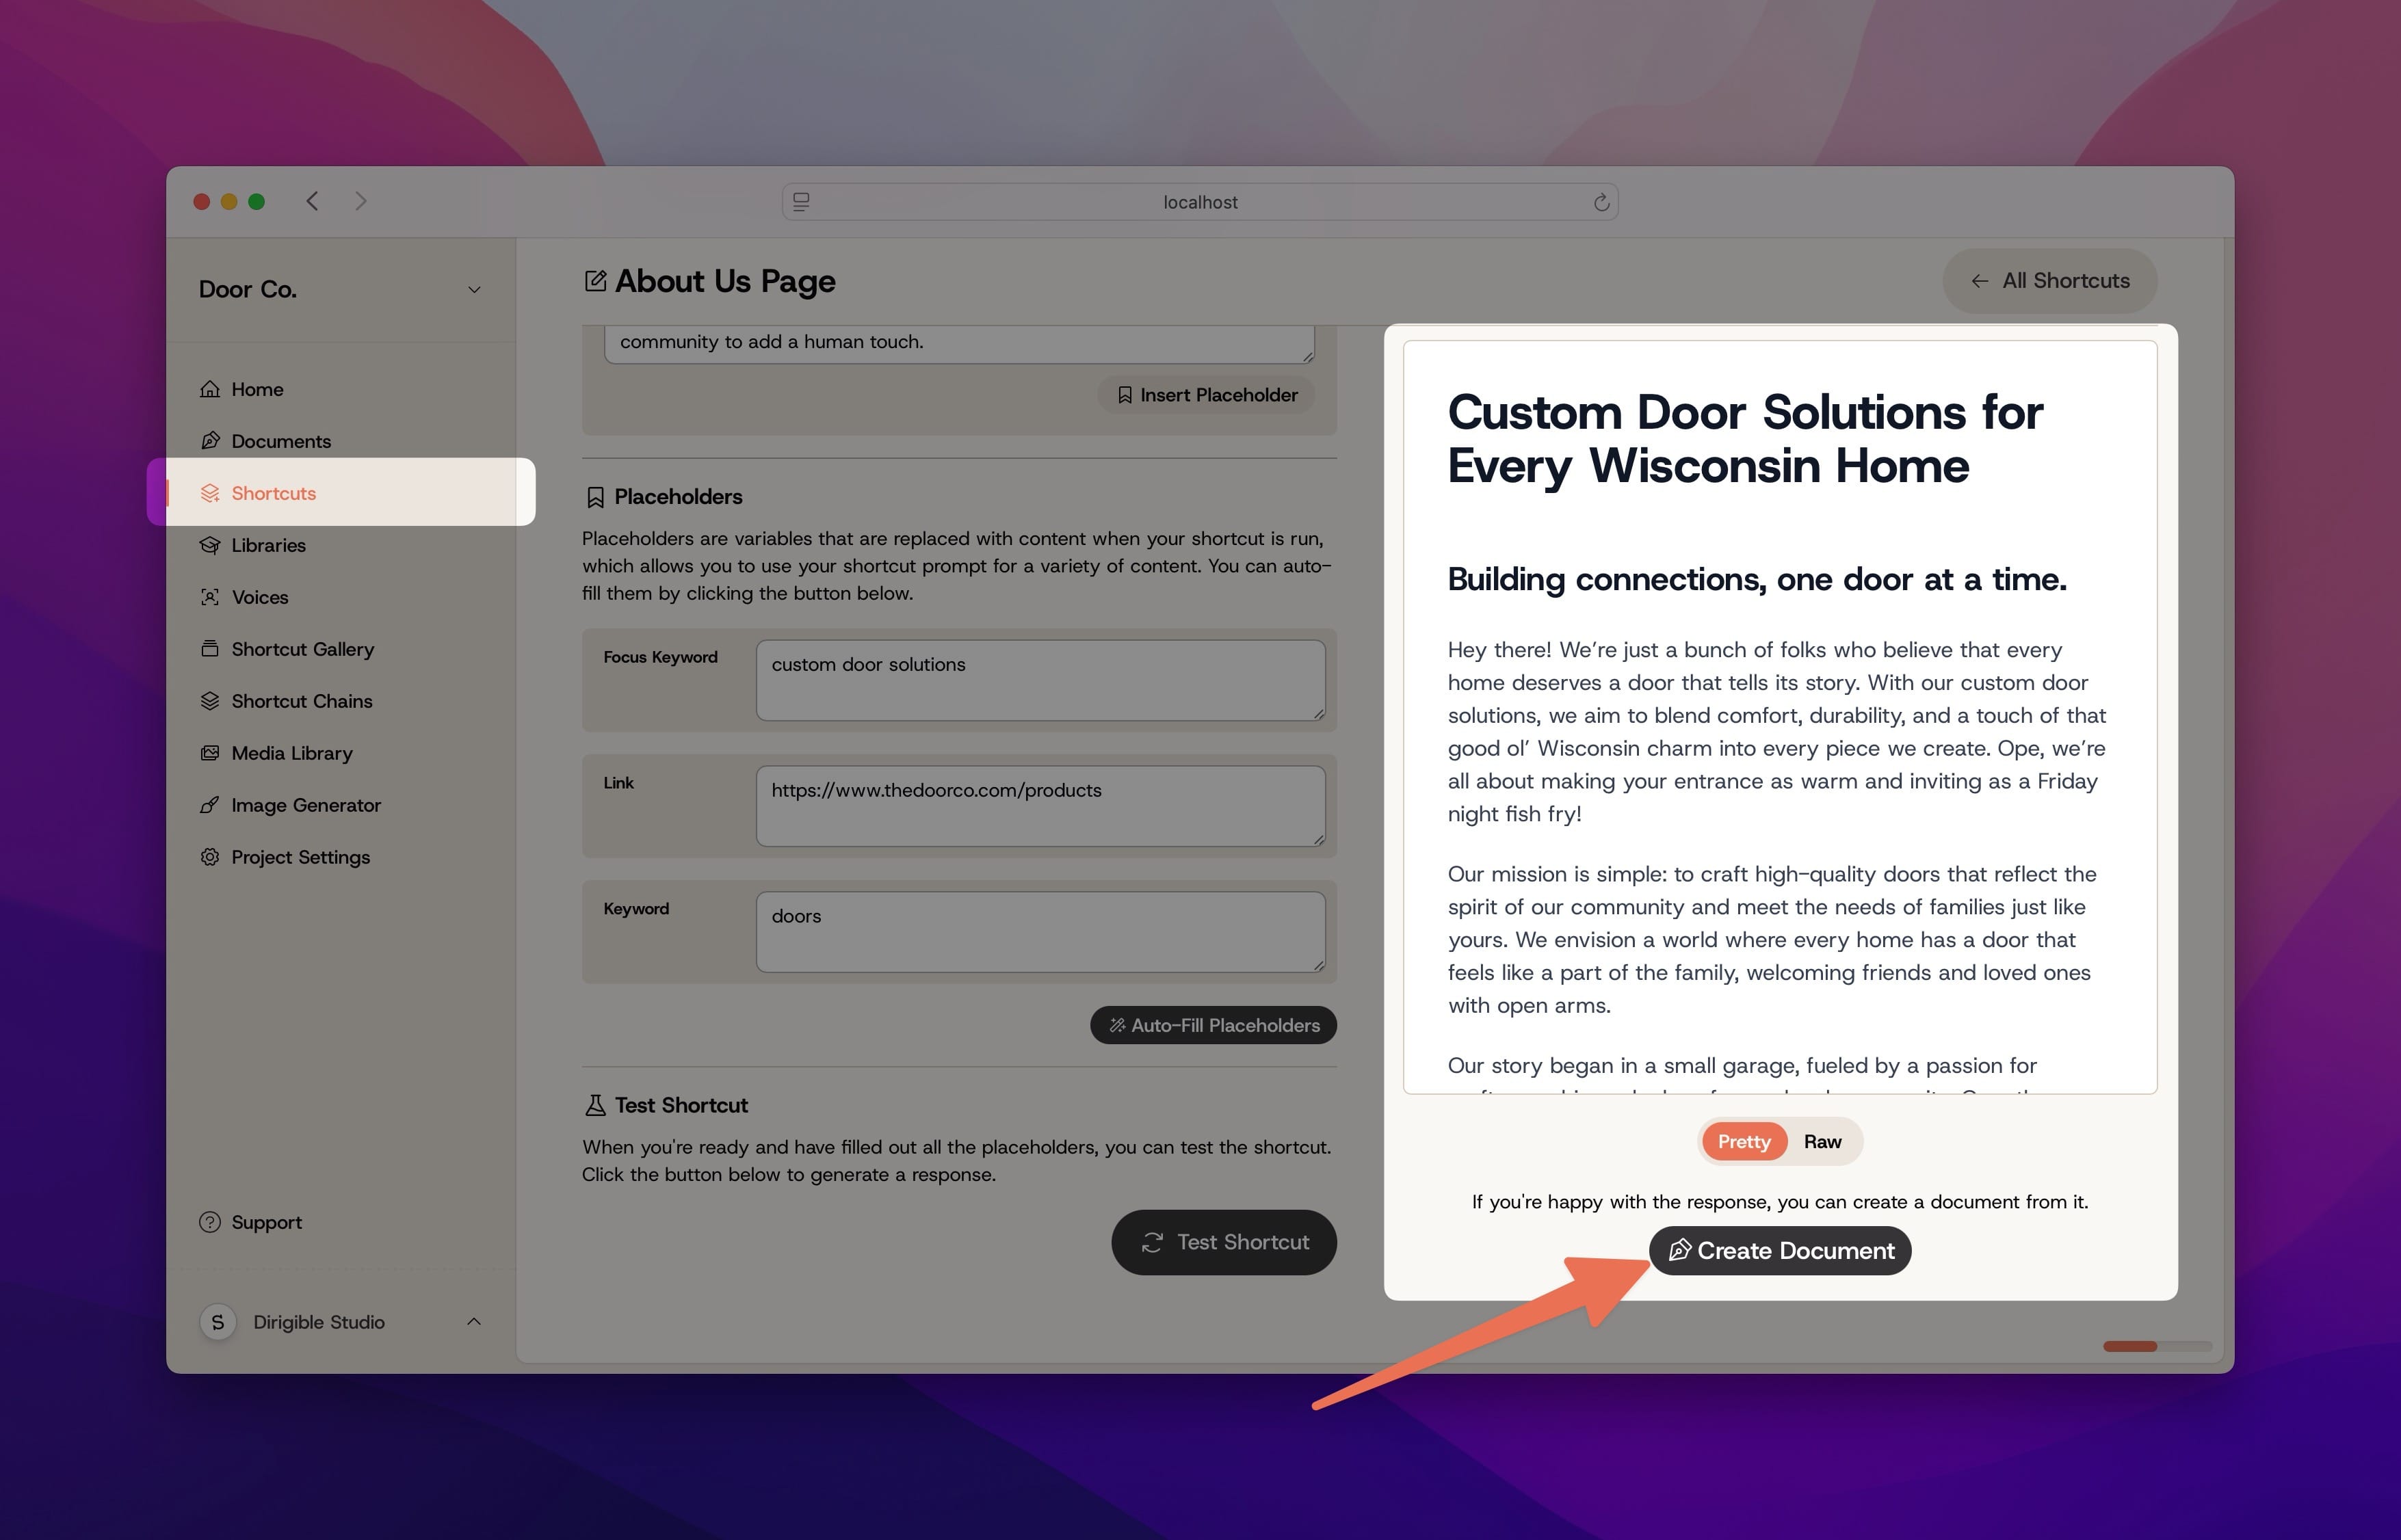
Creating a Document from a Shortcut
You can create a Document by running a Shortcut. When you are happy with your Shortcut’s output, click the Create Document button below it to immediately generate a Document from the content.
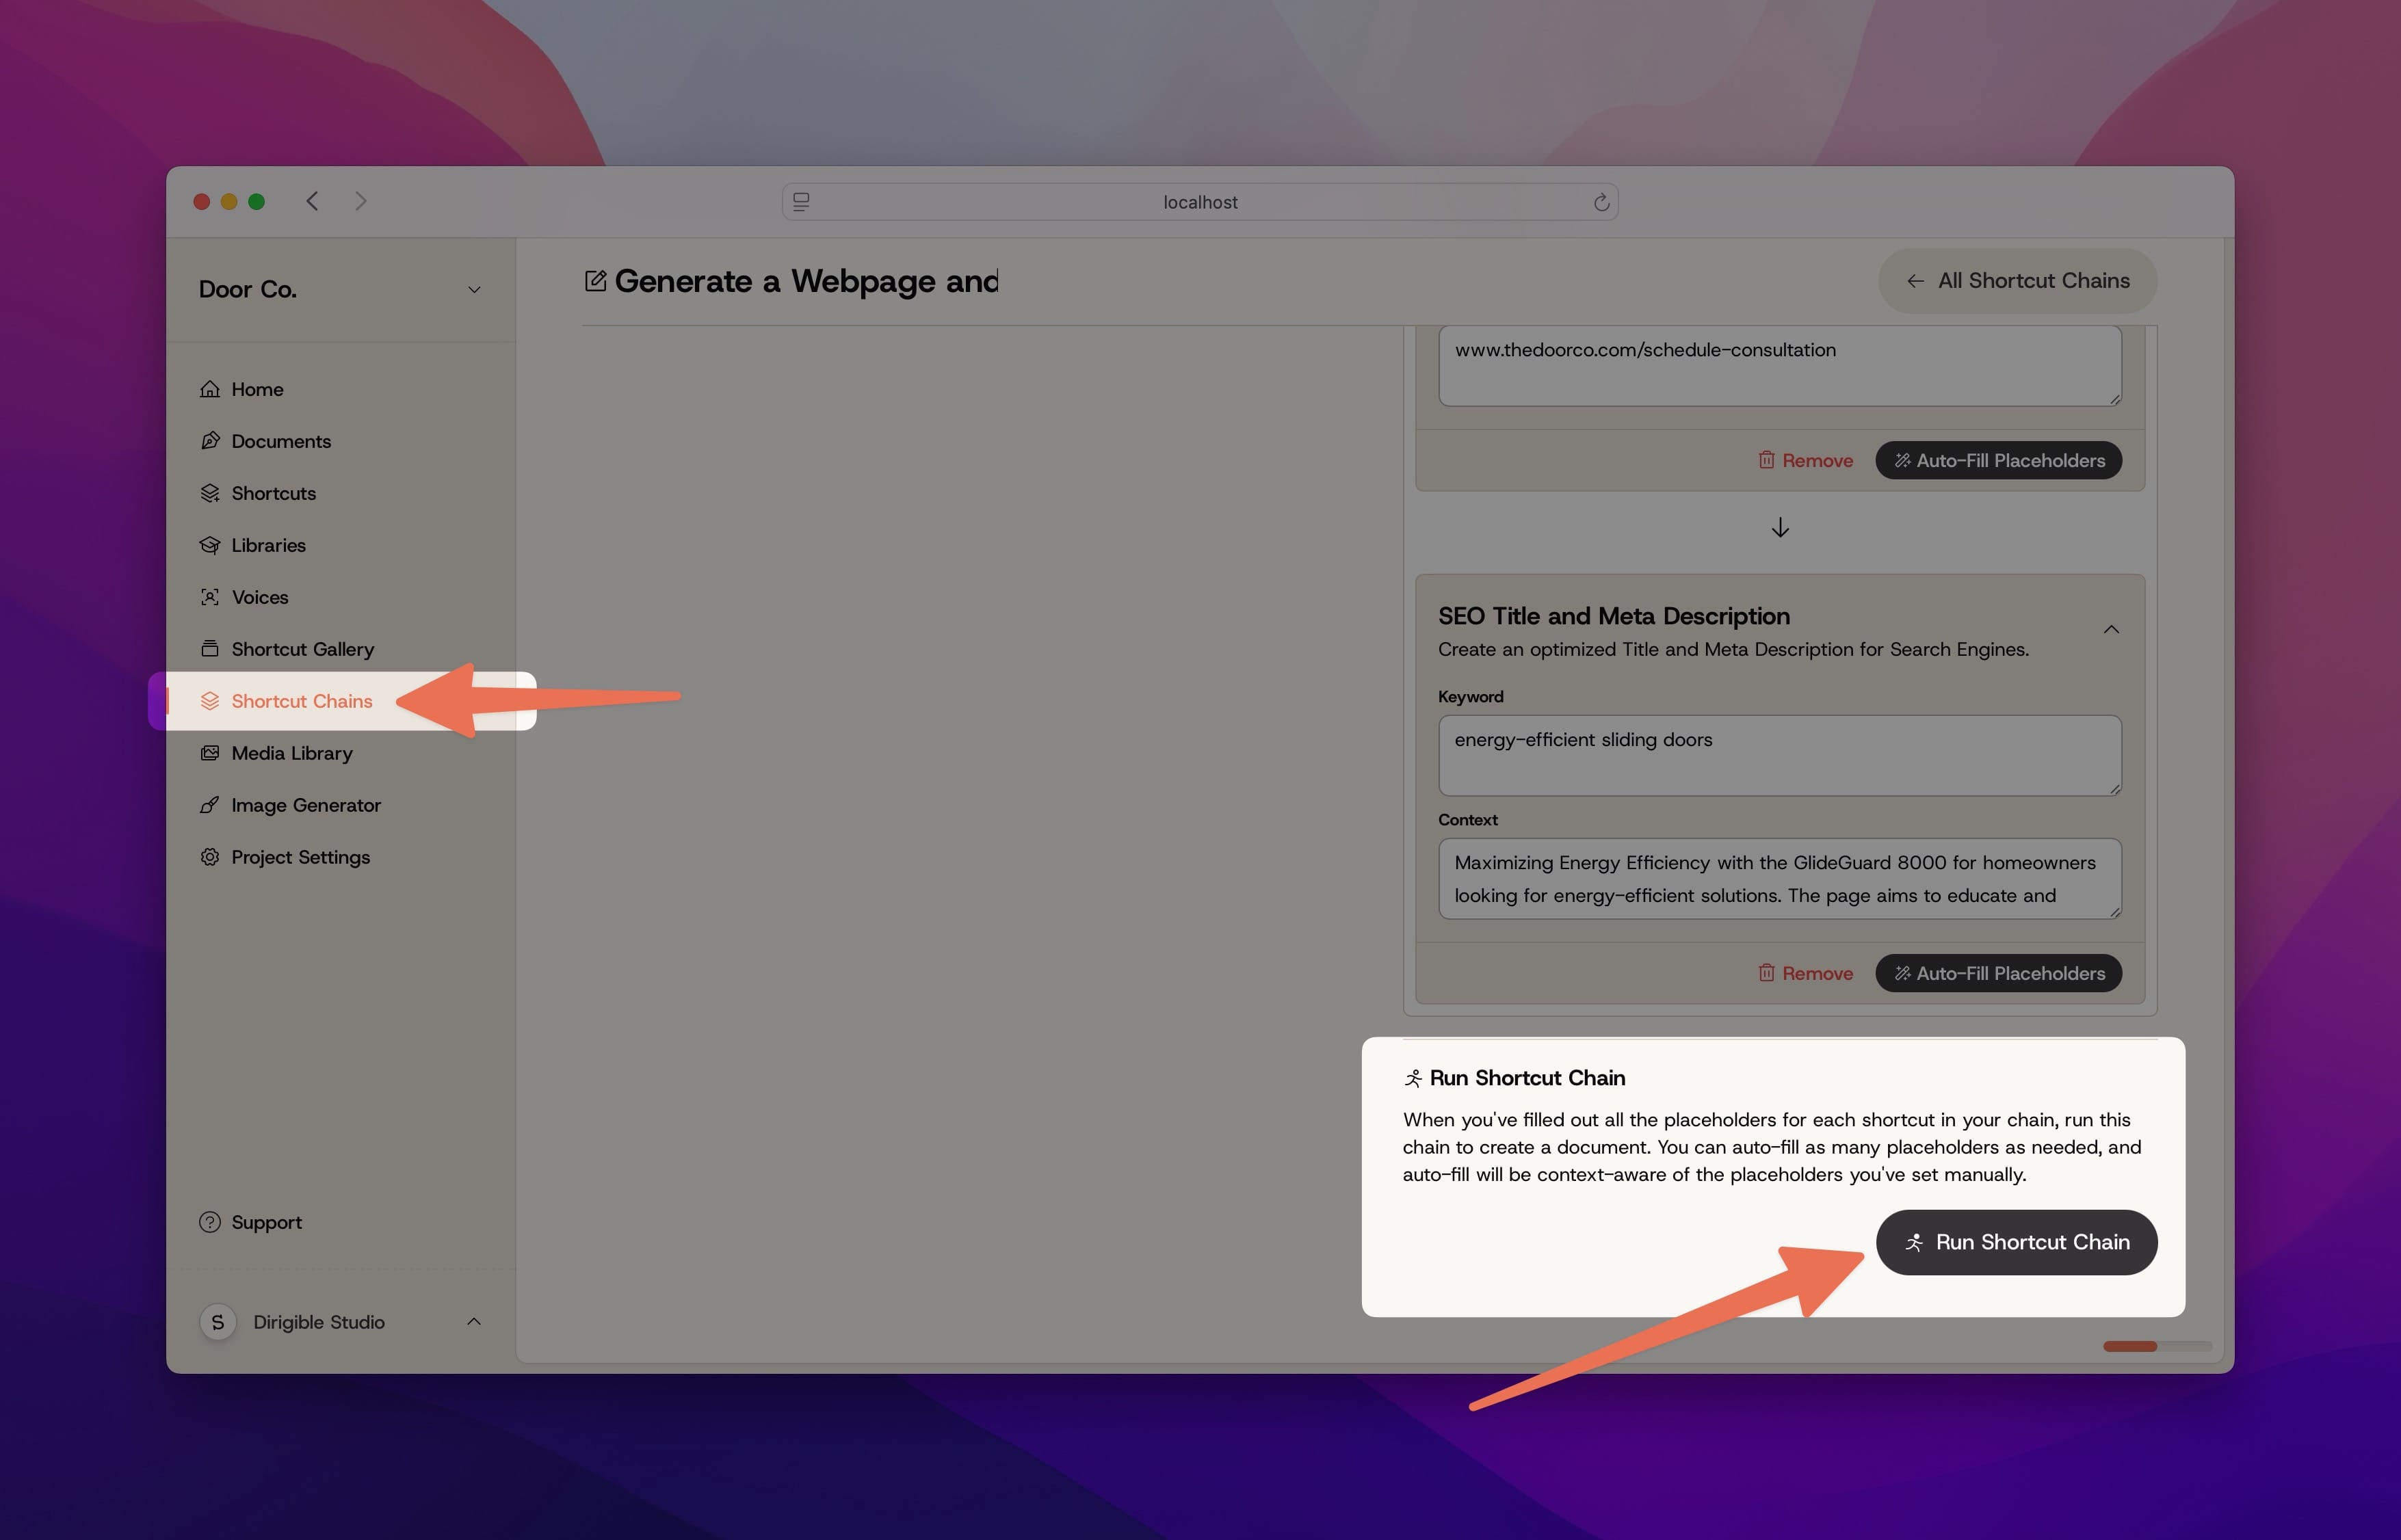
Creating a Document from a Shortcut Chain
Similar to running a Shortcut, running a Shortcut Chain will compile Nim’s output into a new Document. Unlike with a regular Shortcut, you don’t need to take any action to create a Document this way—it’ll happen on it’s own.
Creating a Document by Remix
Lastly, you can remix and existing Document into a new one. Open up the Document you’d like to remix, hit the Remix Content button, and select the Shortcut you’d like to use to remix.
Working with Documents
Working with Documents means working with Nim’s editor, which is a fully featured editor. There’s also a full suite of AI tools at your fingertips.
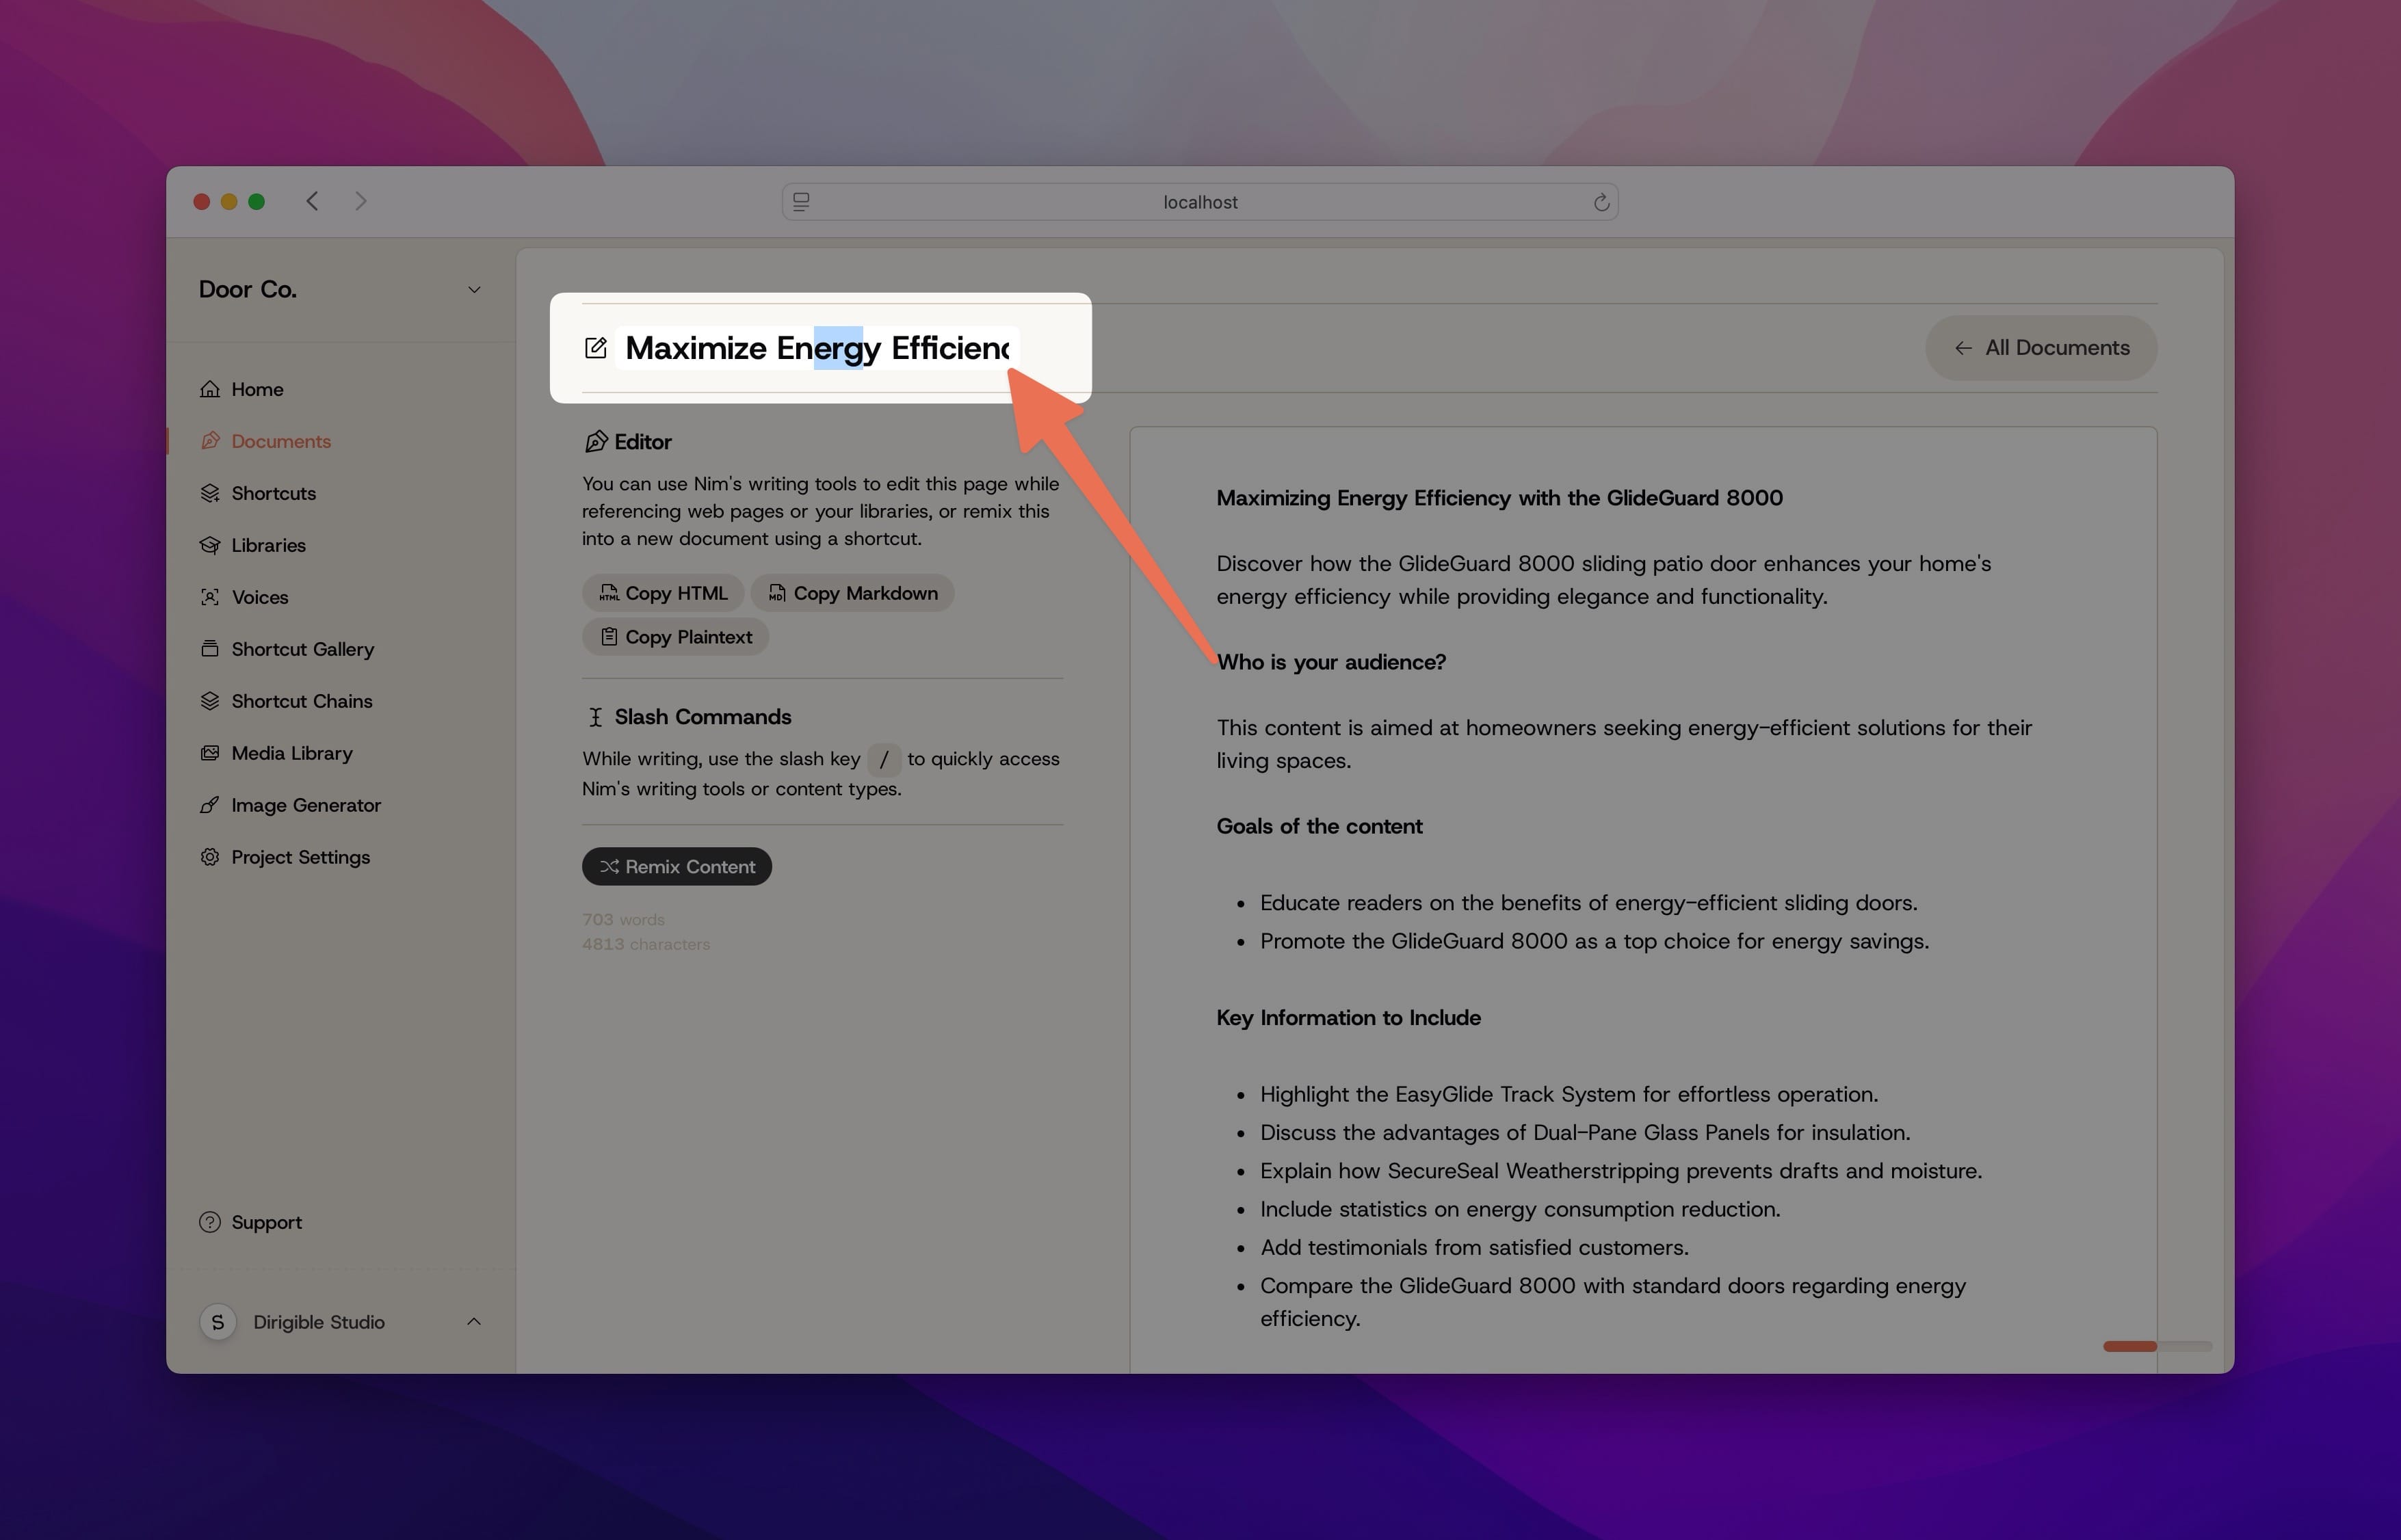
Naming Your Document
You can edit the name of your Document by clicking on its name in the header. Nim will save your changes when you’re done typing.
Get to writing faster by getting familiar with Nim’s inline editing tools. Familiar? Yes. Easy? Yes Powerful? Very much yes.
Editing your Document
Once you’re in your document, you can edit your document like any other editor. Just click and type!
Changing elements in your Documents
Changing elements in your document, like changing a paragraph to a heading, can be done within the floating context menu that appears above your cursor while editing.
Using the slash (/) menu
We recommend getting familiar with Nim’s handy slash menu. When writing in Nim, just type a / character. The slash context menu will appear, which will allow you to quickly insert elements, including the AI writer.
Superpower your writing with Nim’s AI tools. Pull up the AI Writer context window anywhere in your document.
Inline content generation
You can insert the Nim AI content generator anywhere in your document. We know, pretty cool. You can ask Nim to do whatever you’d like here, and Nim will be aware of both the current document you’re editing and any Library or Voice you send along as additional context.
The inline AI tool is incredibly powerful We can’t wait to see what sort of things you get up to.
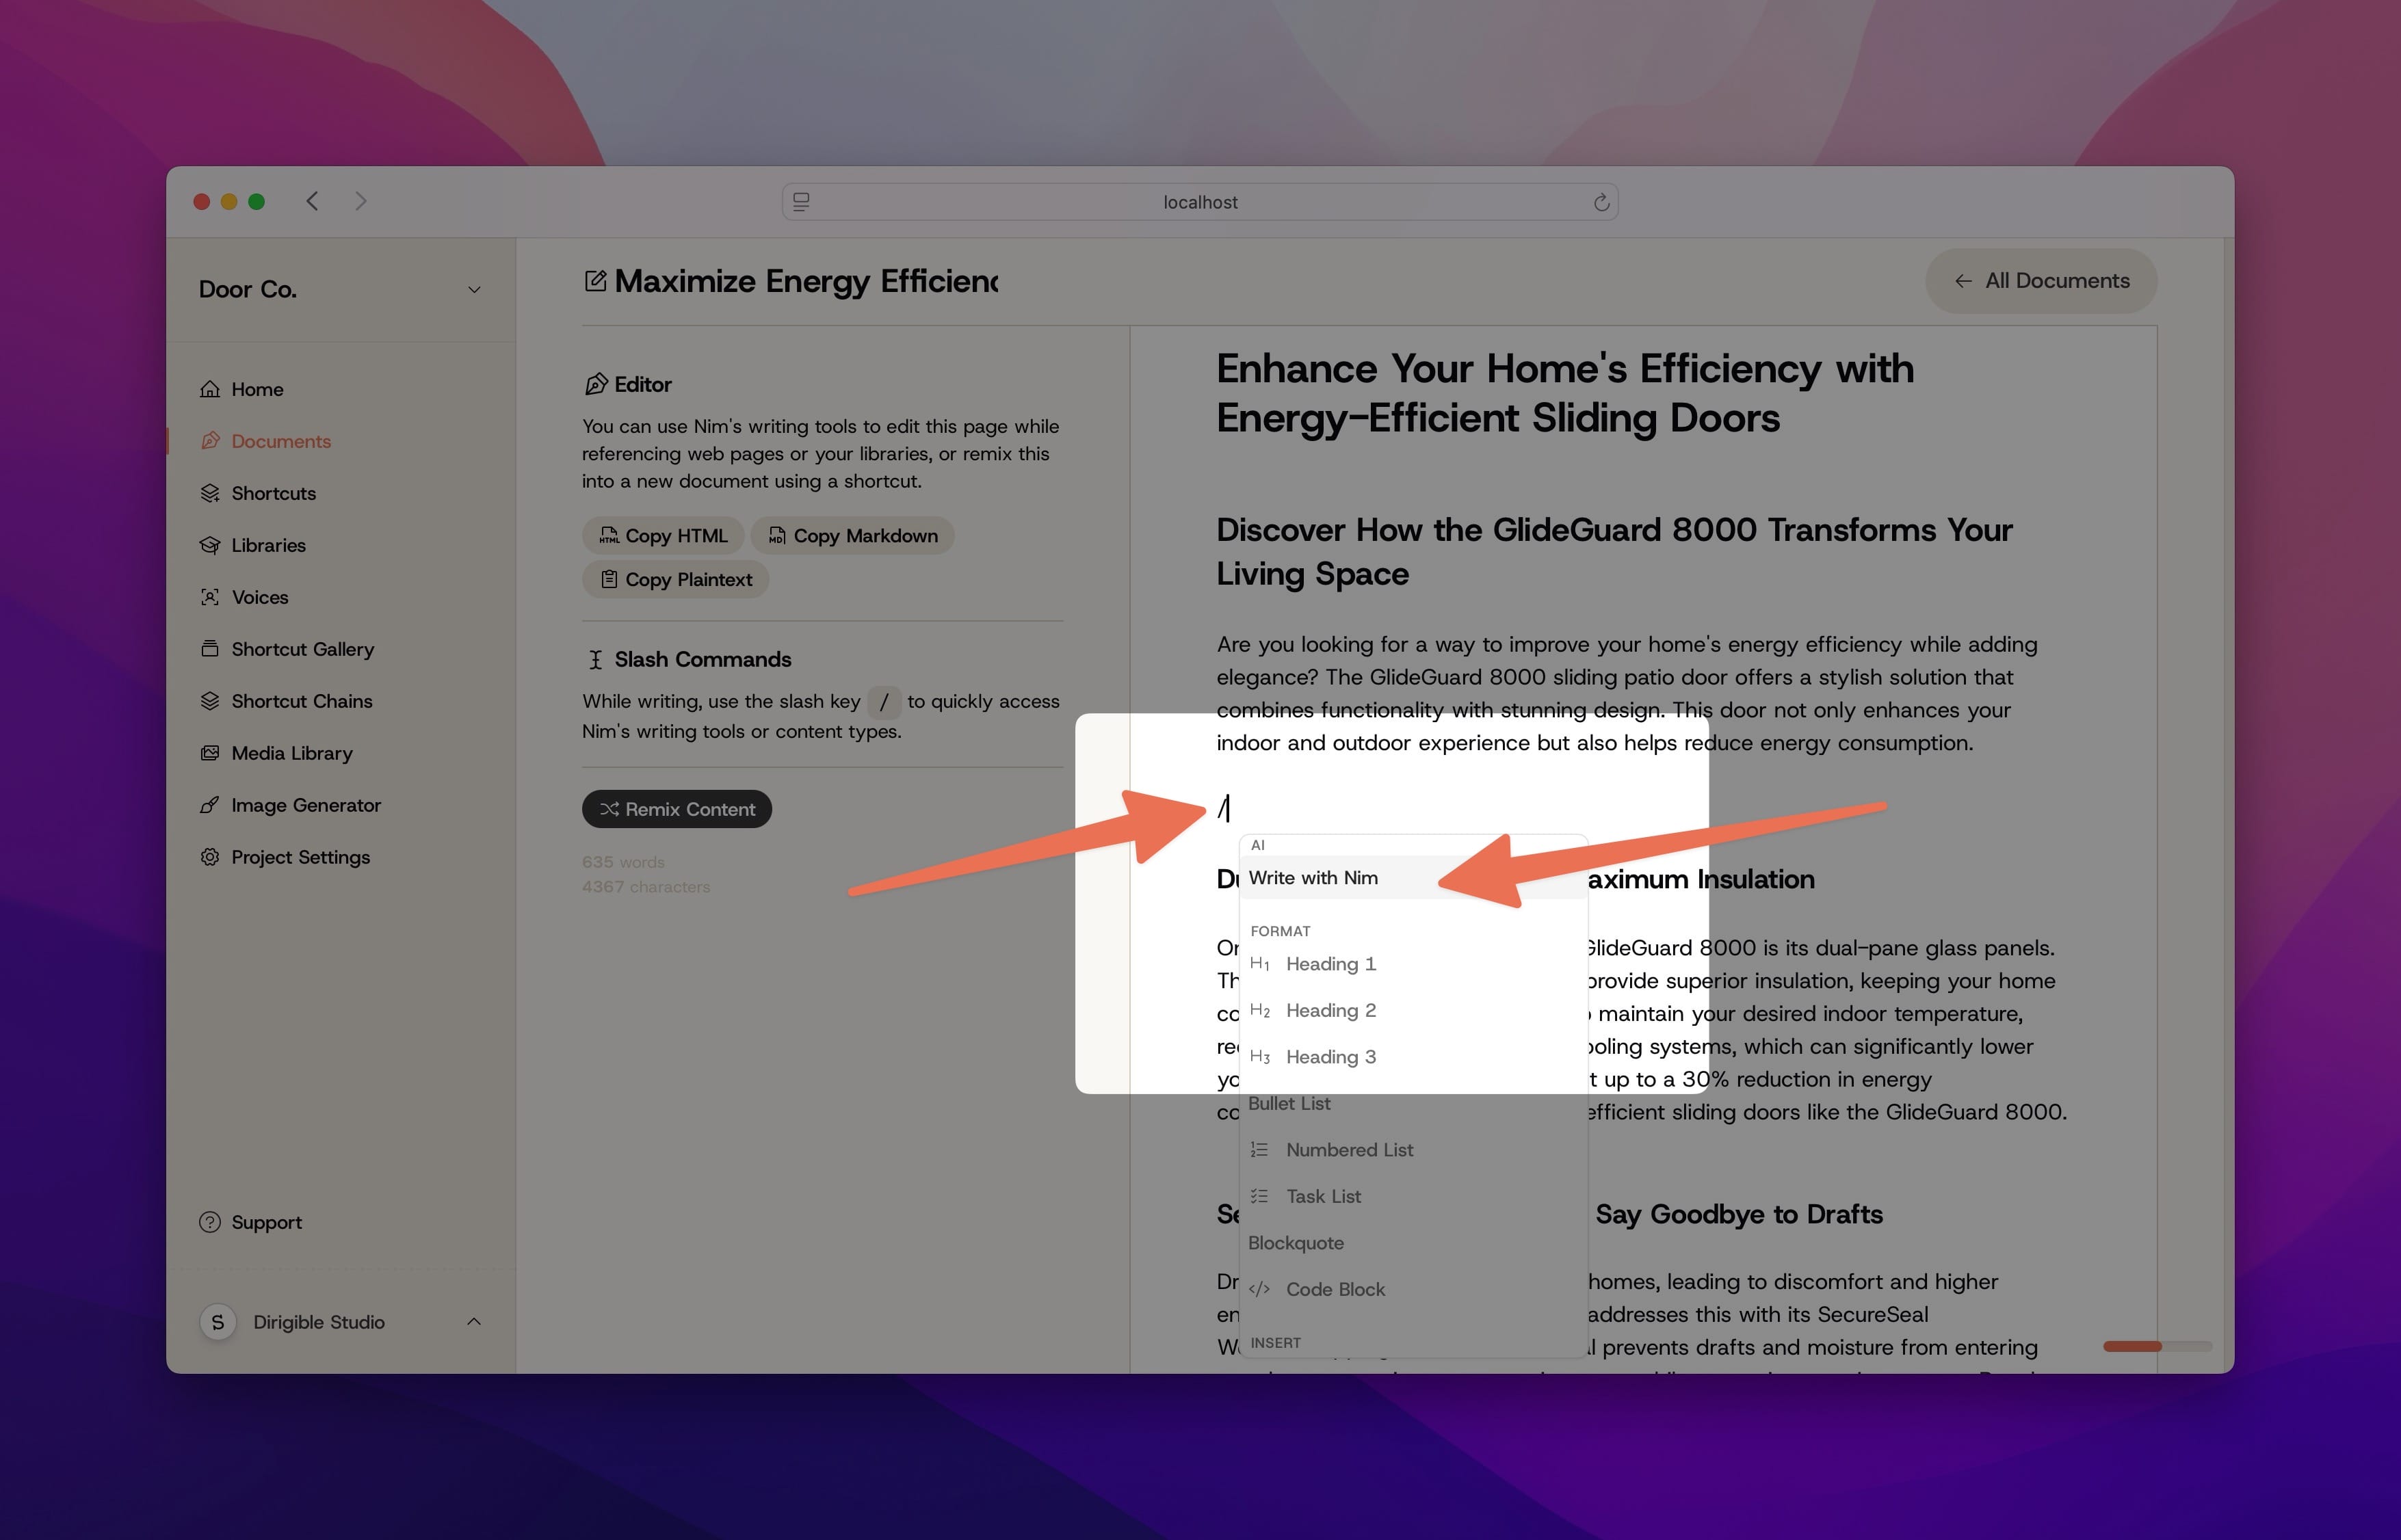
Accessing AI tools with the slash menu
To quickly access the AI tools in your document, open the slash menu by typing / and select Write with Nim. This will bring up the inline prompter, where you can direct Nim to do whatever you’d like.
Note: This is a content generation tool, not a content editor. Every time you use this menu, Nim will generate additional content, not alter existing content.

Accessing AI tools with the context menu
Alternatively, you can directly interact with existing content but selecting it and then using the AI Tools button in the context menu. Here, you can direct Nim to do things like change the reading level, simply the content, translate it, etc.
Exporting Document content
You can get content out of the Nim document editor in plaintext, HTML, or Markdown with the click of a button.
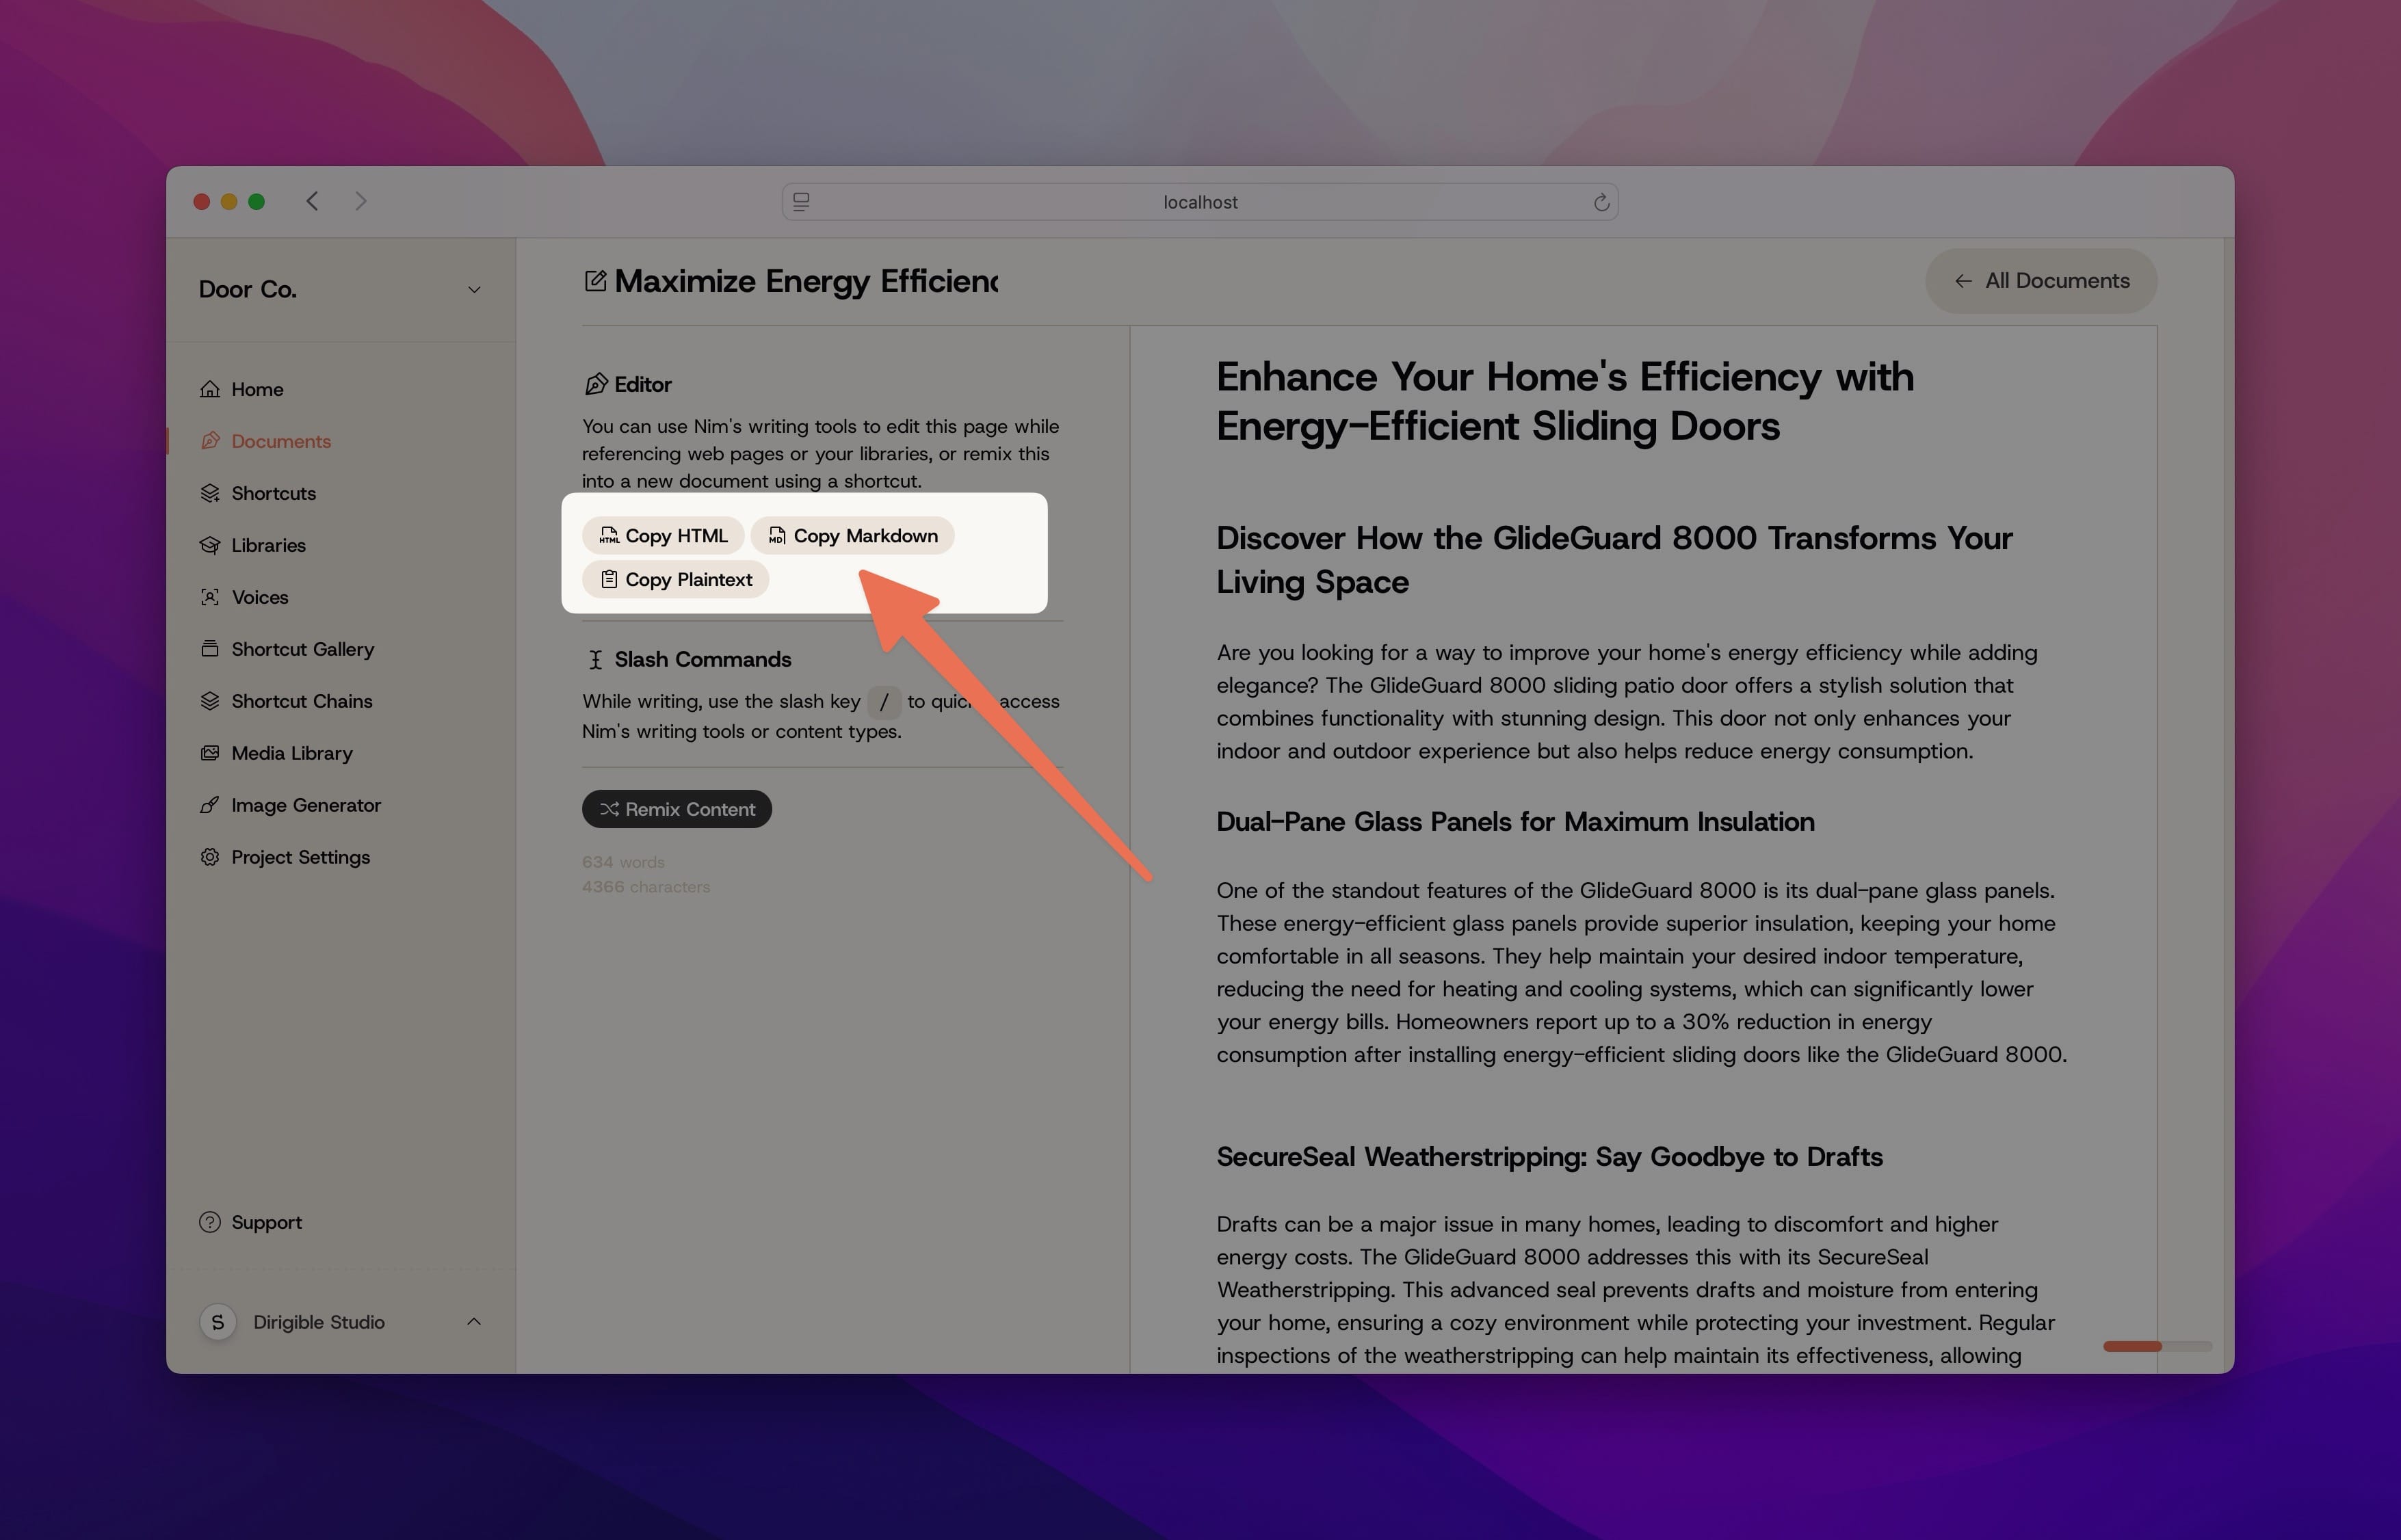
Copying your document’s content
Clicking on Copy HTML, Copy Markdown, or Copy Plaintext in the editor window will copy the content of your document to your clipboard, which you can paste anywhere you like. Be sure to copy your document in the best format for it’s destination.
Save some time and copy from the documents list
If you just need to get the content out of a document and don’t need to do any editing, you can copy the HTML directly from the Documents page.
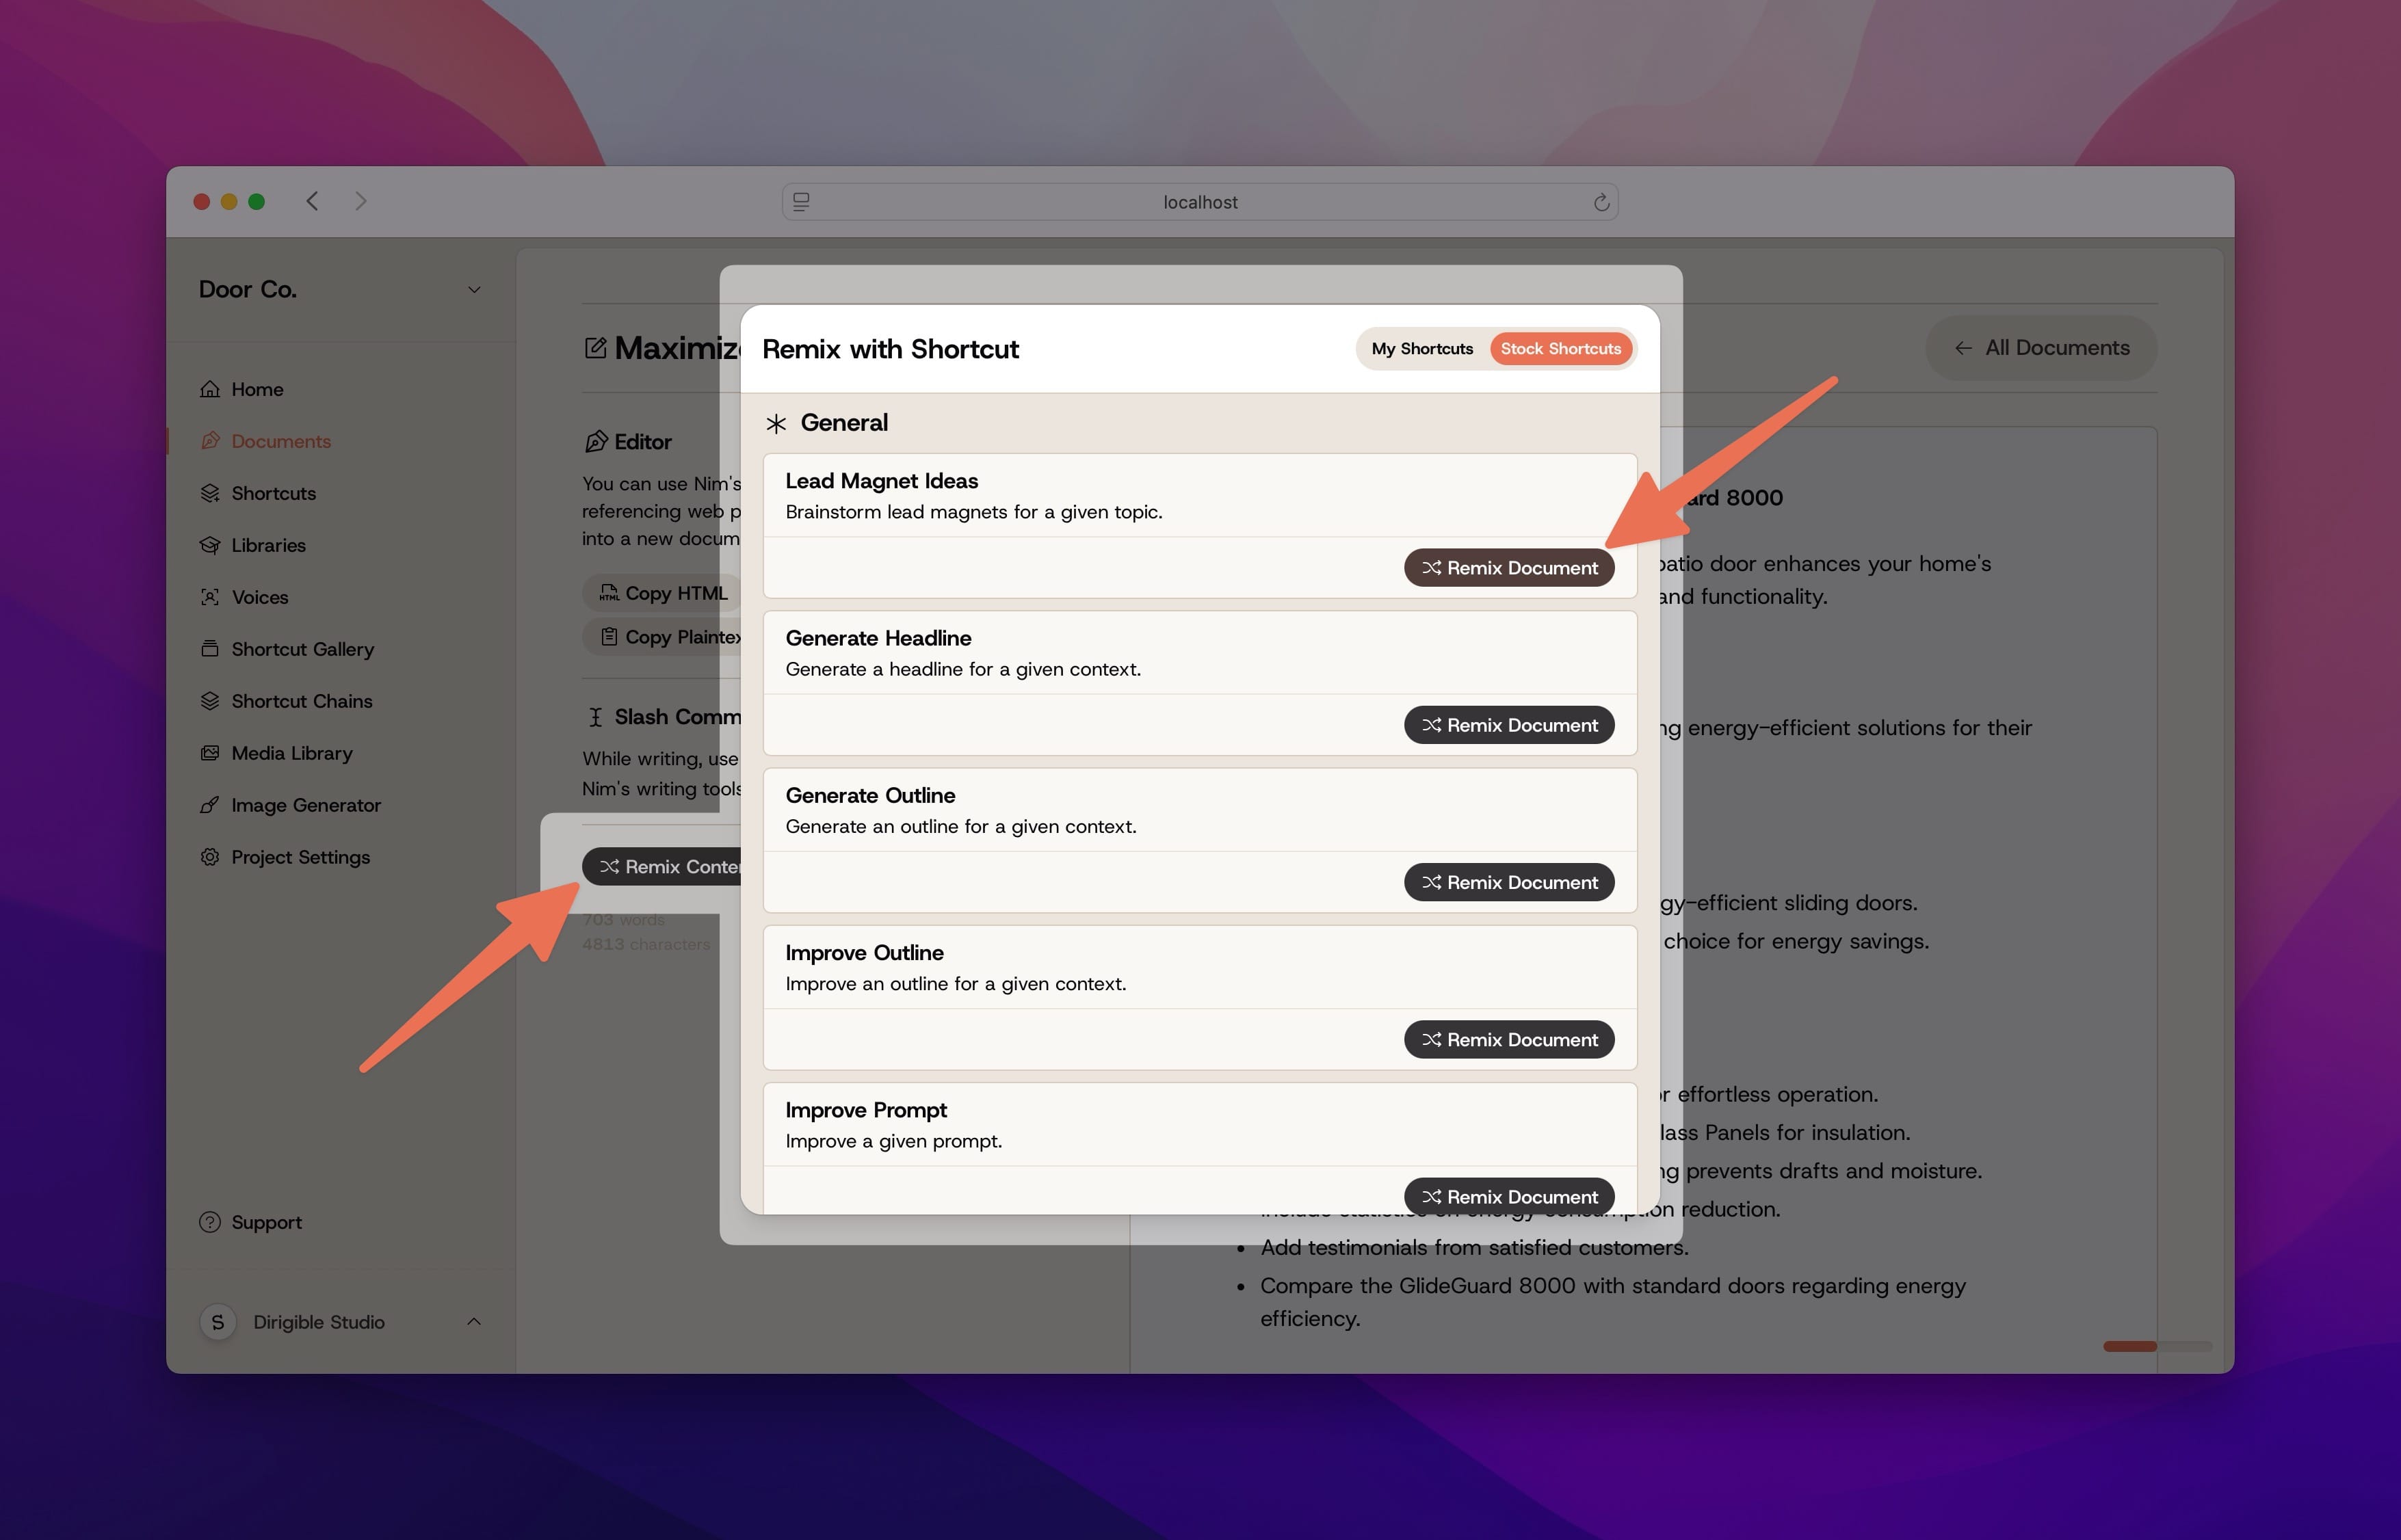
Remixing Documents
Harness the power of your Shortcuts by using them to remix your Documents. Remixing is a powerful to transform existing content for new places, faces, and contexts.

Accessing the remix menu
At any time, you can hit the Remix Content button in the Nim editor to bring up the remix menu.
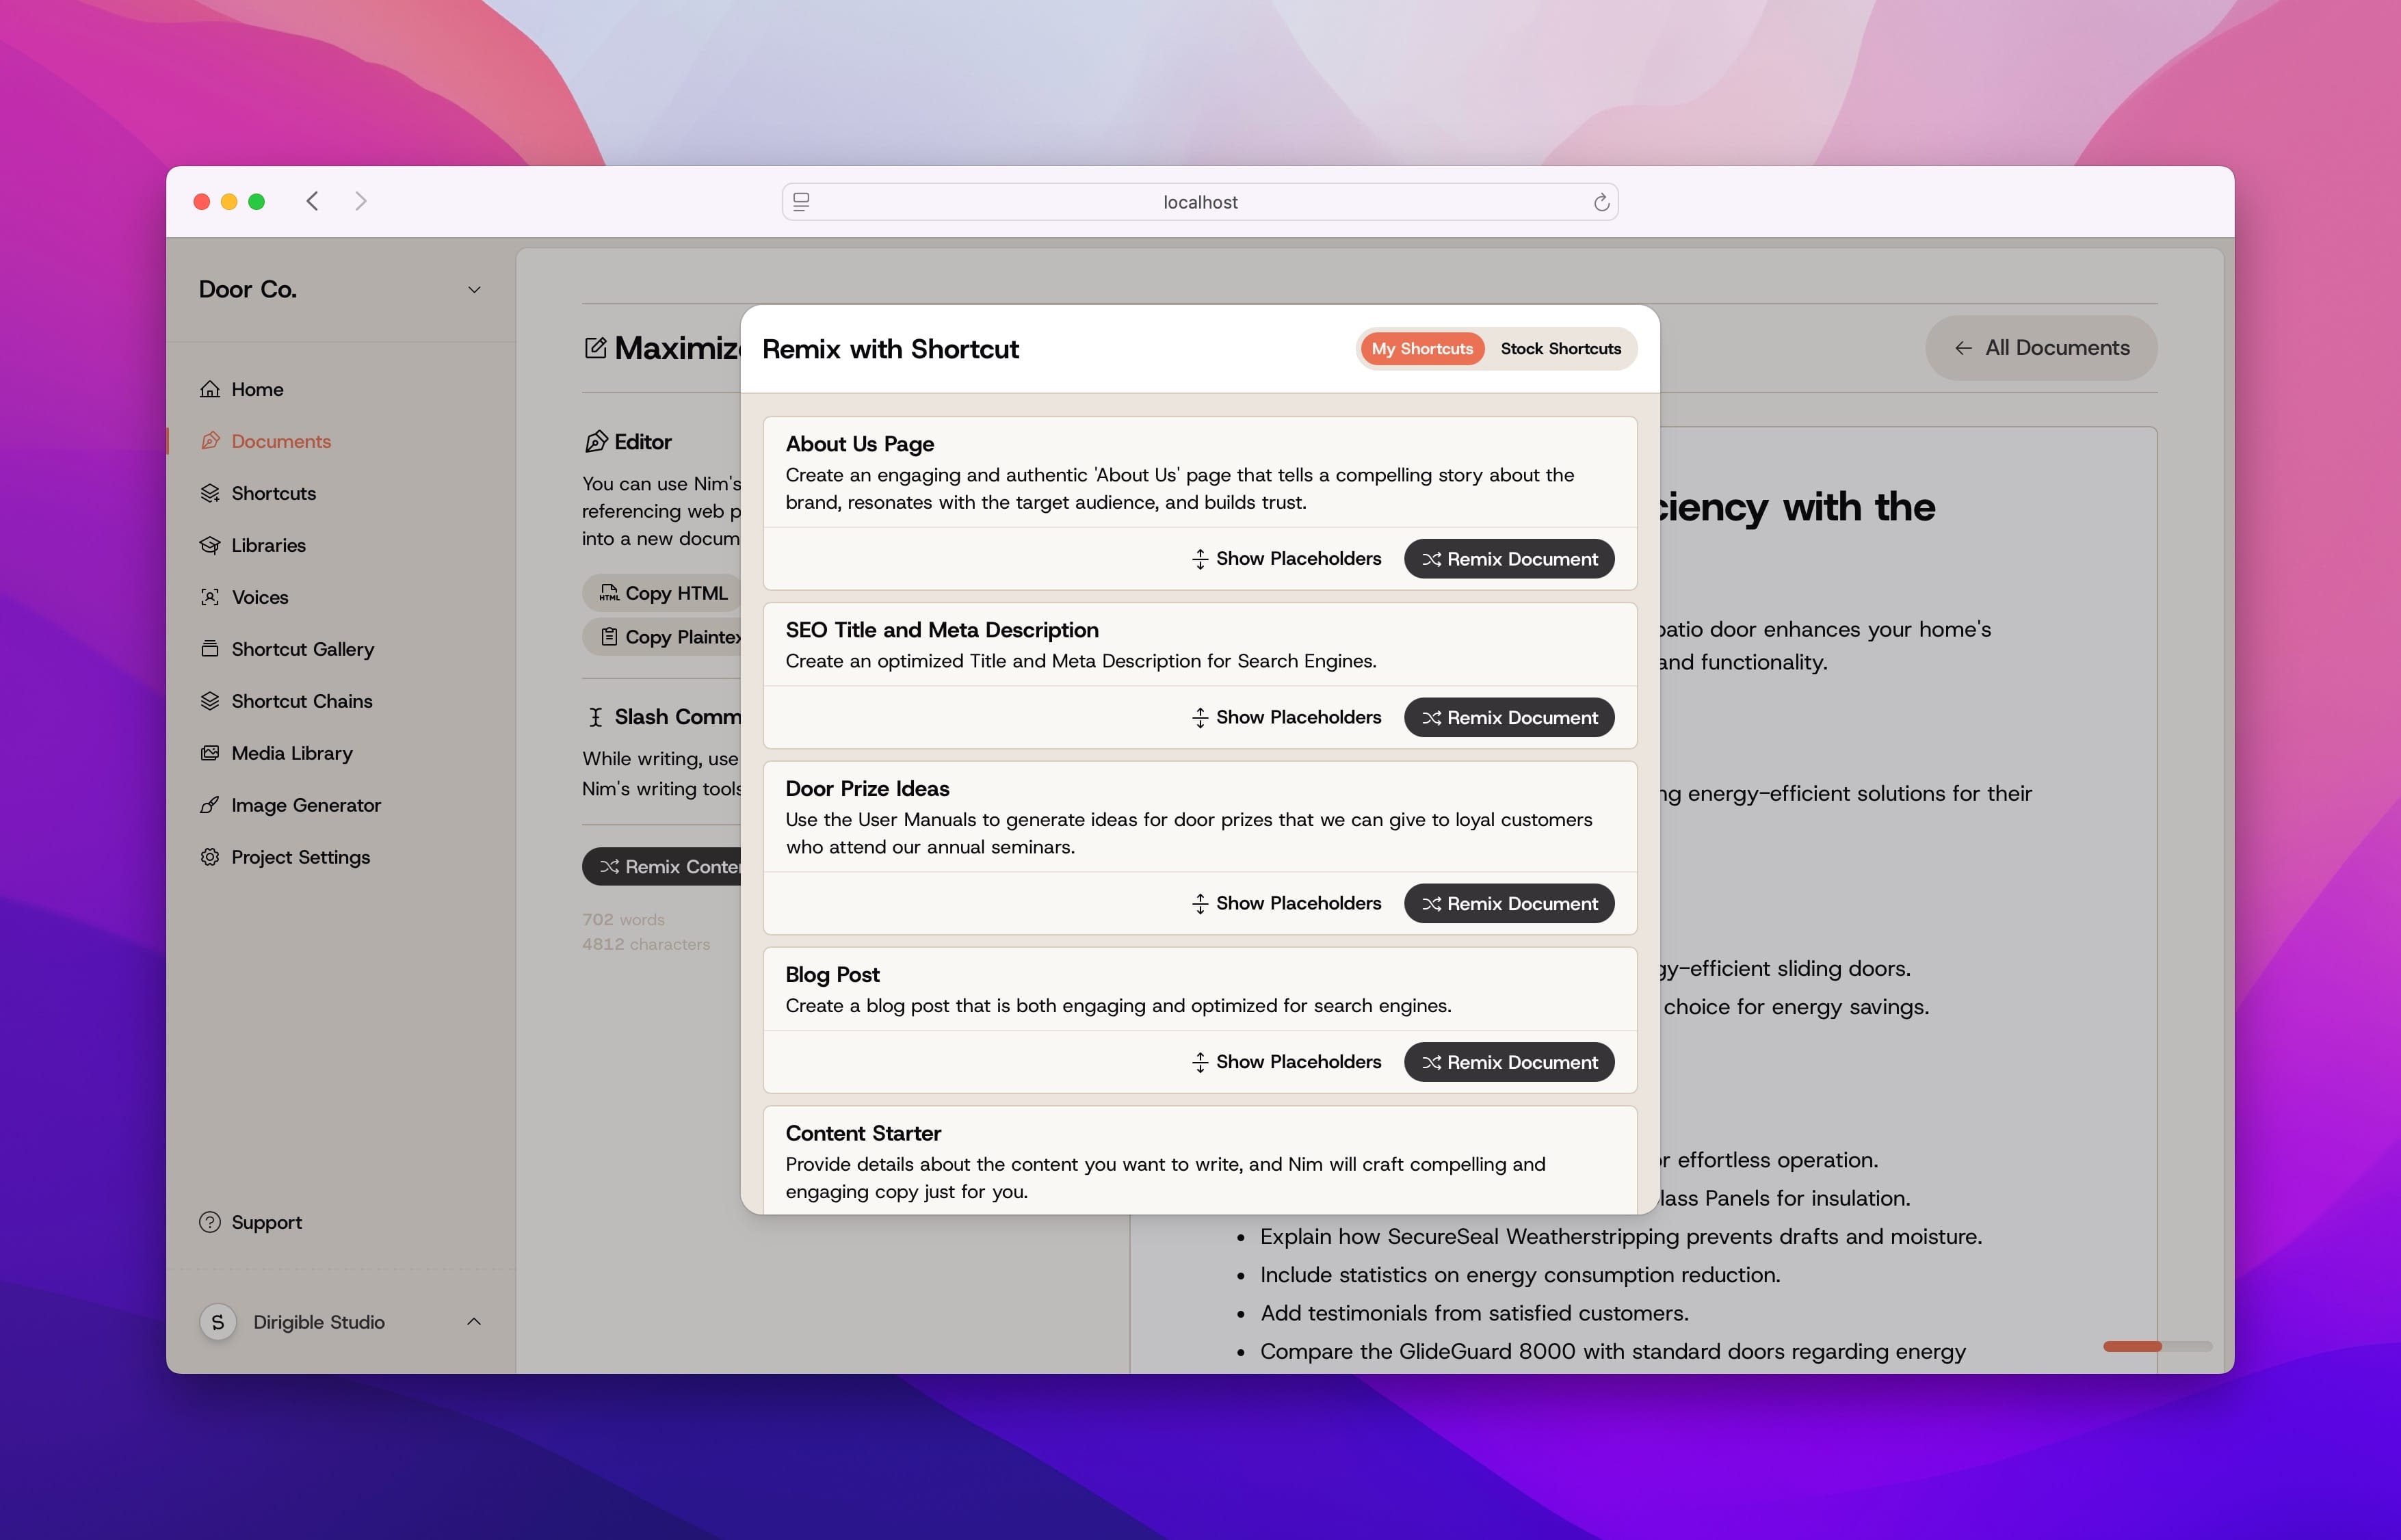
The remix menu
The remix menu contains all of your Shortcuts, as well as stock Shortcuts from the Shortcut Gallery. Select the Shortcut you’d like to use to filter this content. Any shortcut you use will use your entire Document in it’s context.
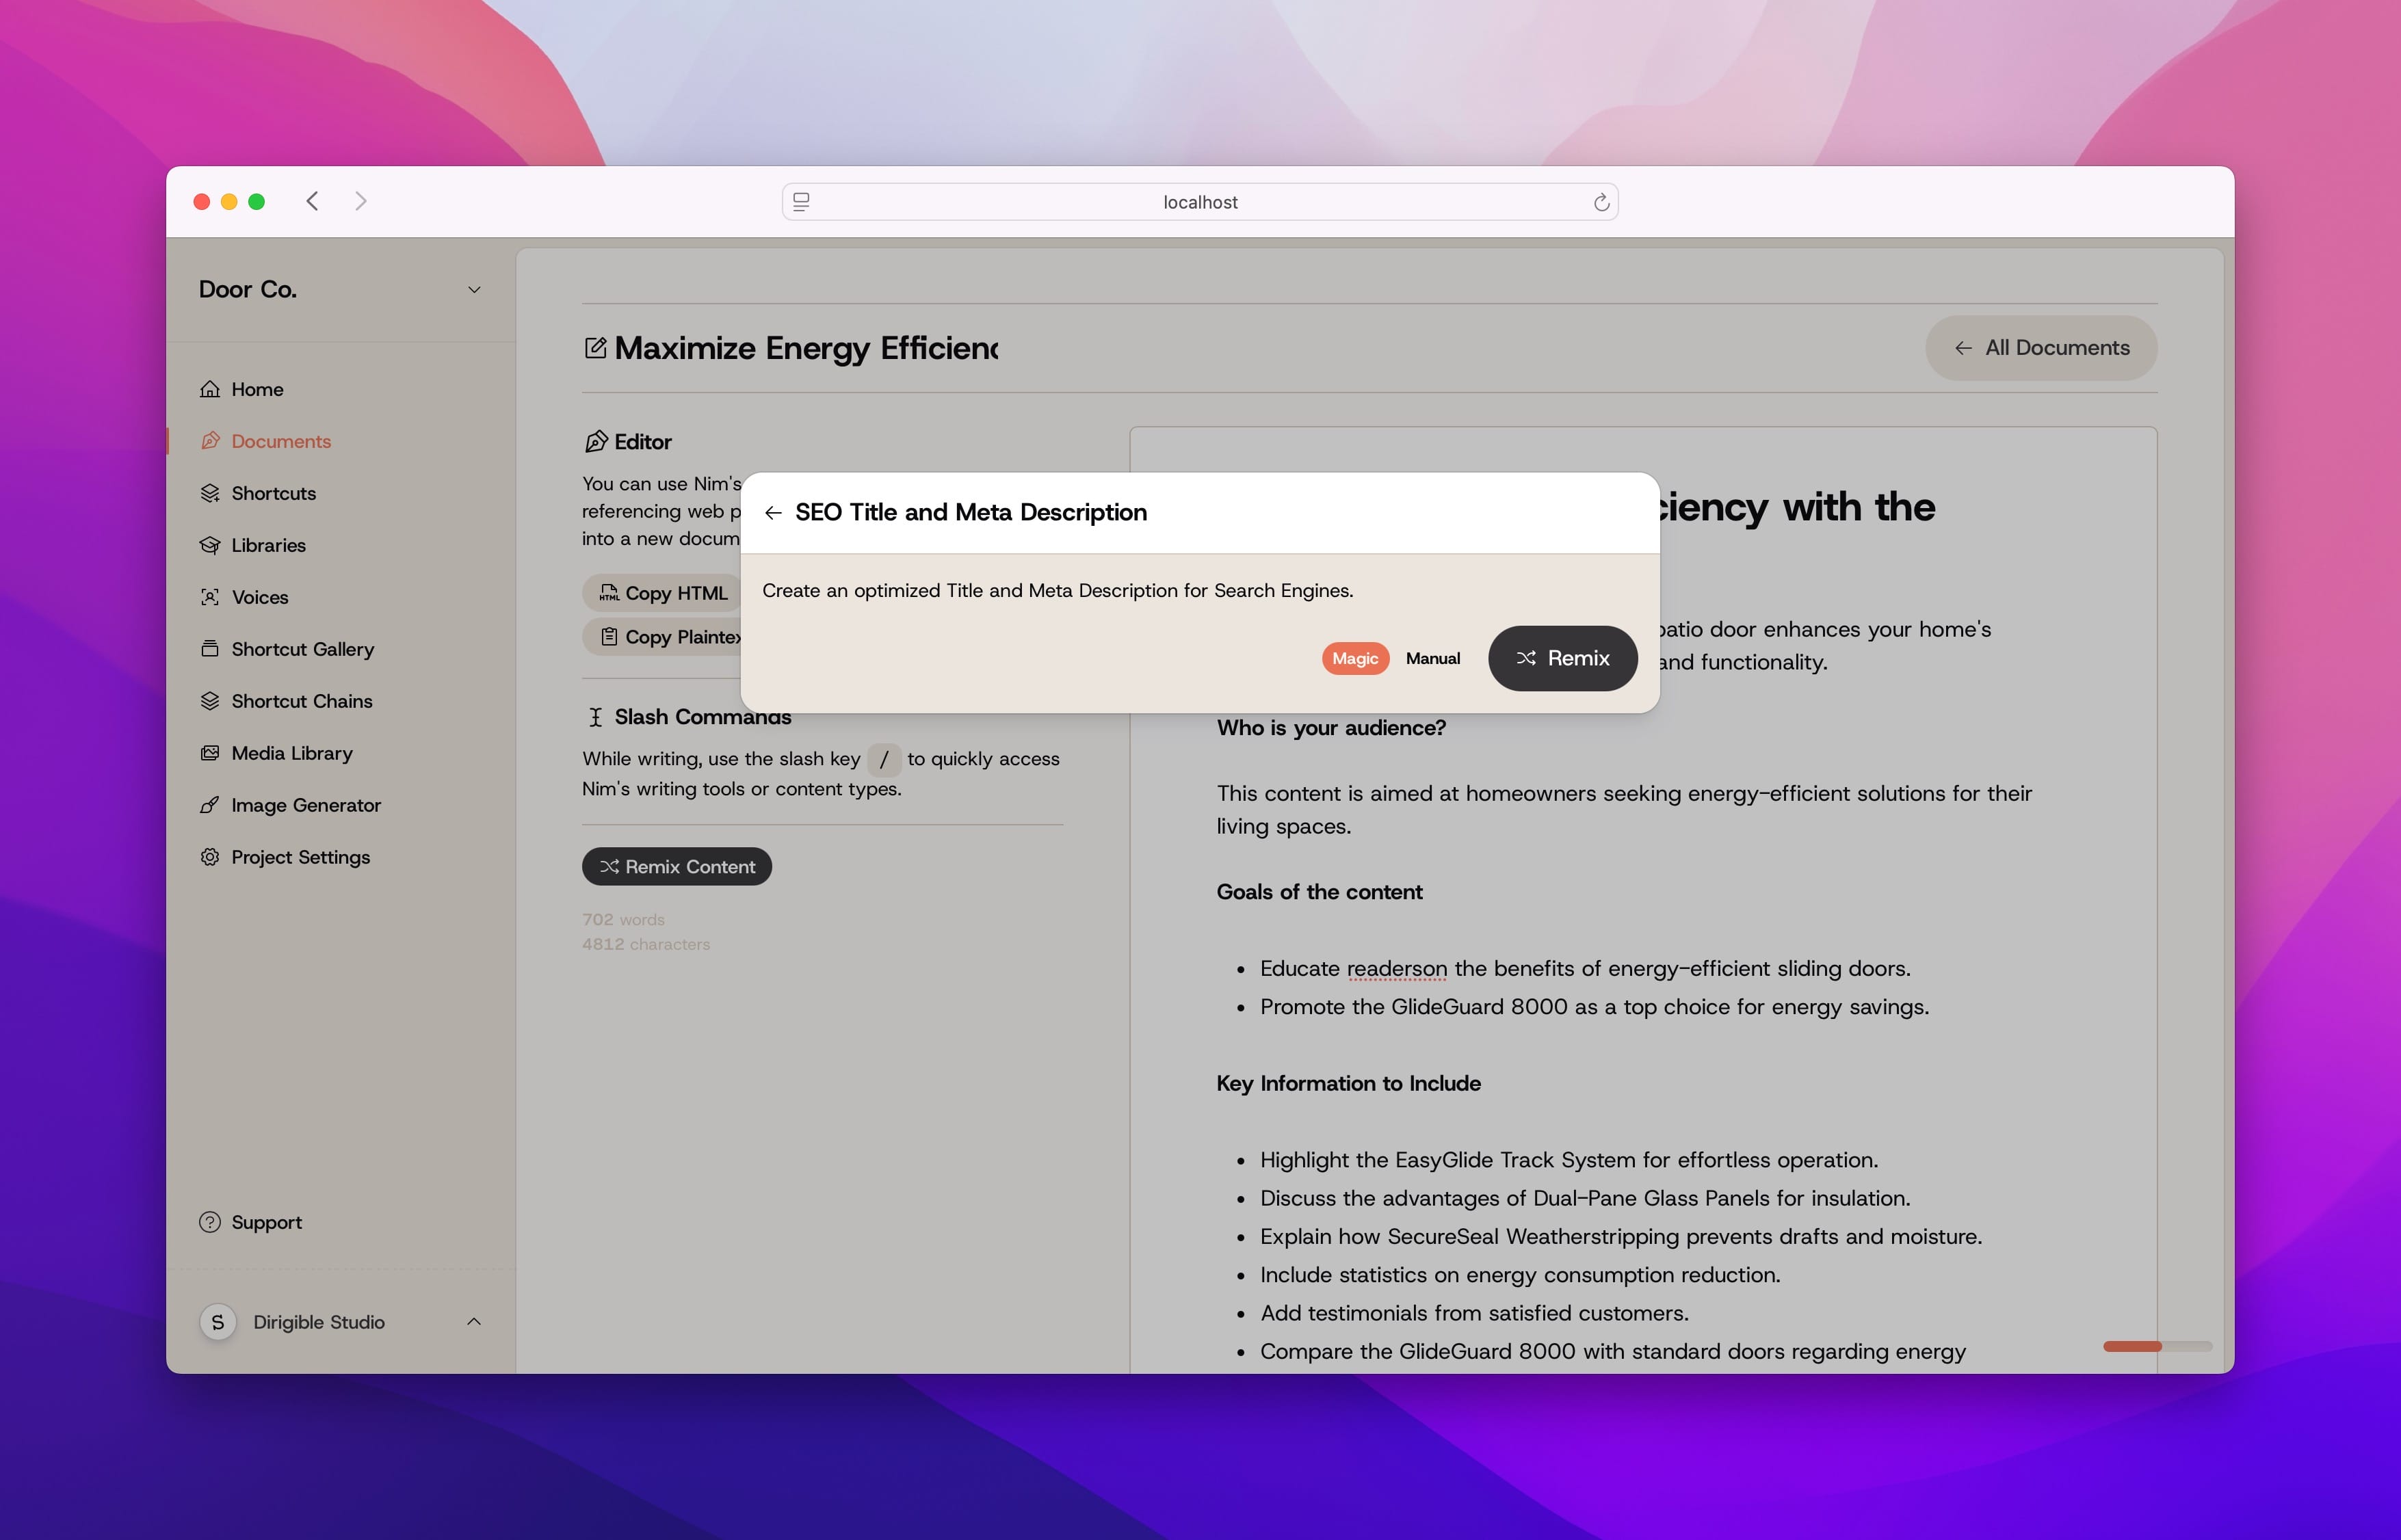
Using the magic remix
When you choose a Shortcut, you’ll be asked whether you want to use magic or manual remix. Magic remix will automatically fill any Placeholder the Shortcut has with context from your Document.
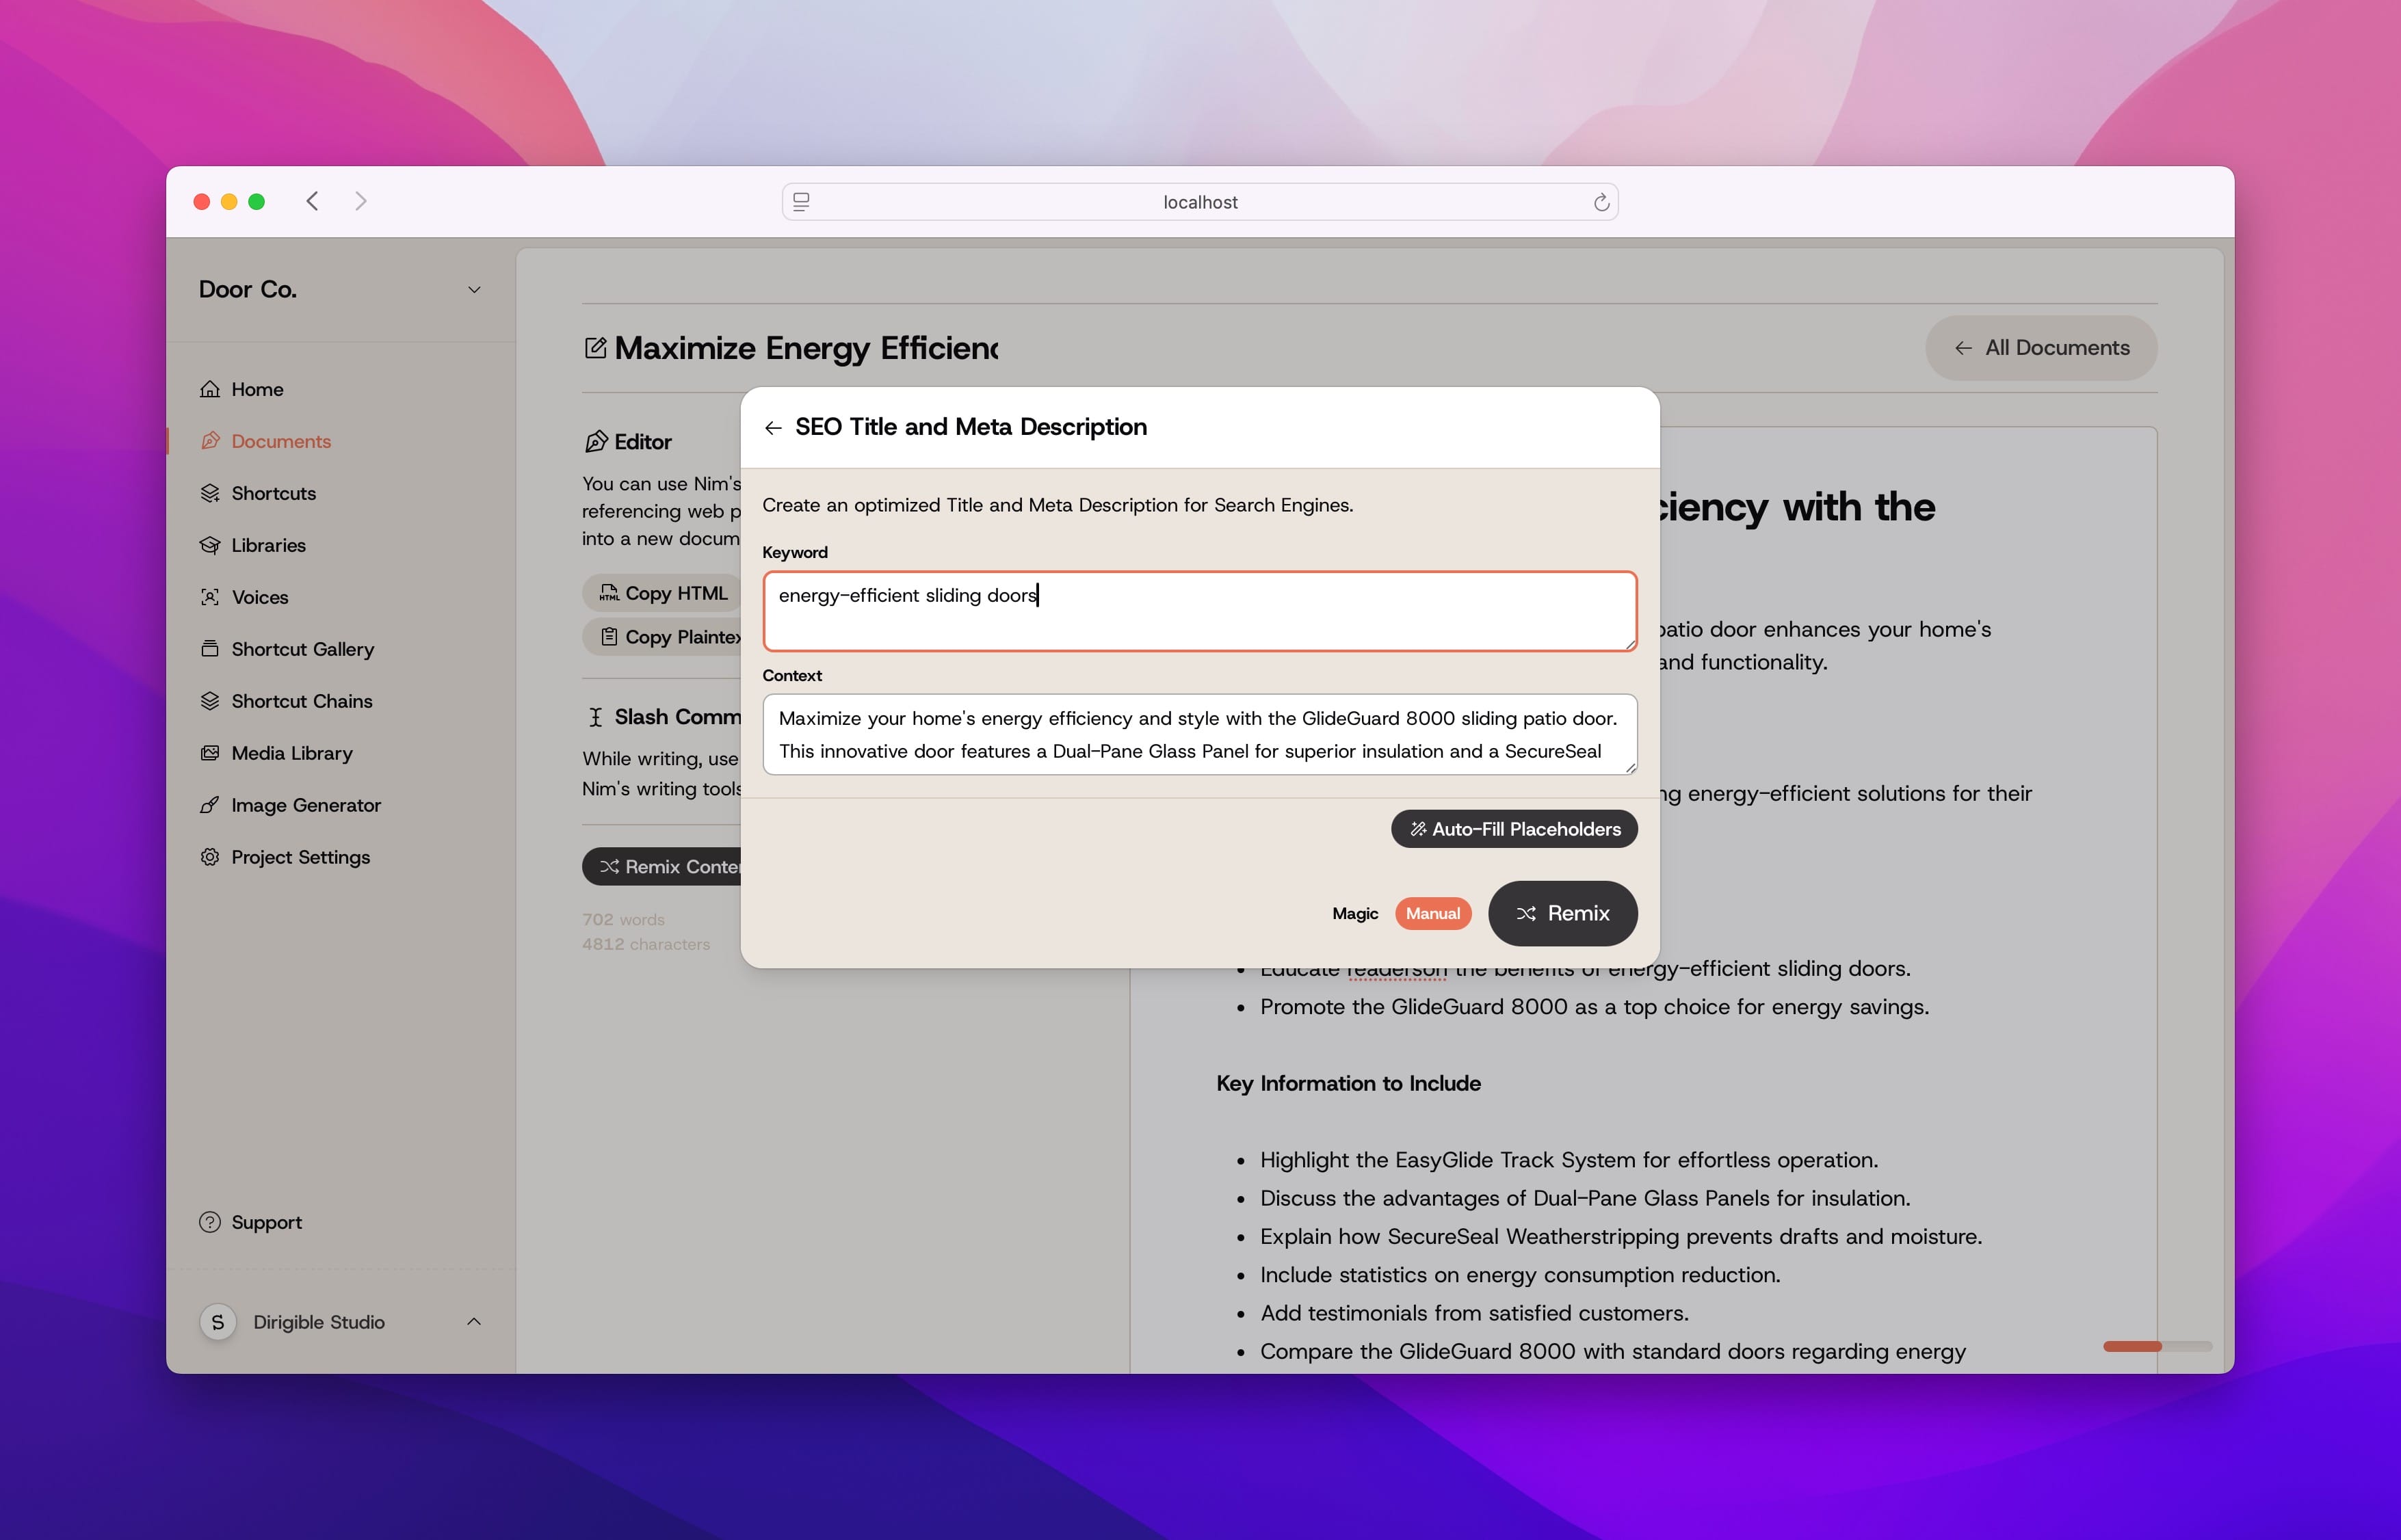
Using the manual remix
If you’d rather fine tune your remix, you can choose manual remix and fill these placeholders yourself. You can use the Auto-fill Placeholders tool provided to get you started.
The output of a remix
Once you’re happy with your remix settings, clicking the Remix button creates a brand new Document.
To provide the best experiences, we use technologies like cookies to store and/or access device information. Consenting to these technologies will allow us to process data such as browsing behavior or unique IDs on this site.